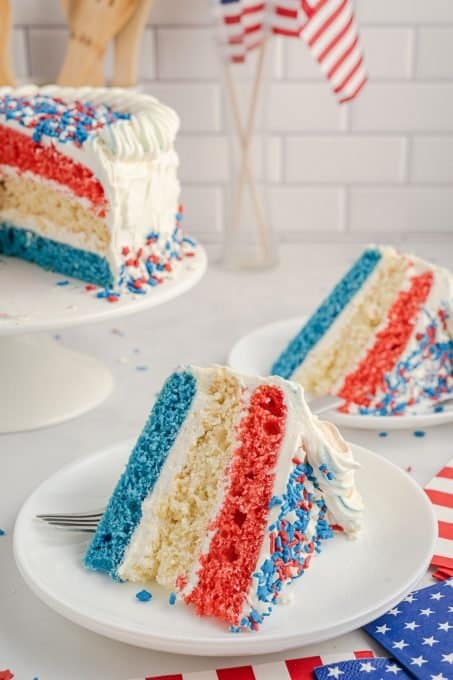
This Patriotic Layer Cake is a Memorial Day and 4th of July dessert that tastes as good as it looks! Layers of red, white, and blue cake are covered with sweet vanilla buttercream and topped with sprinkles for an extra festive touch. It’s the perfect cake for any patriotic celebration.
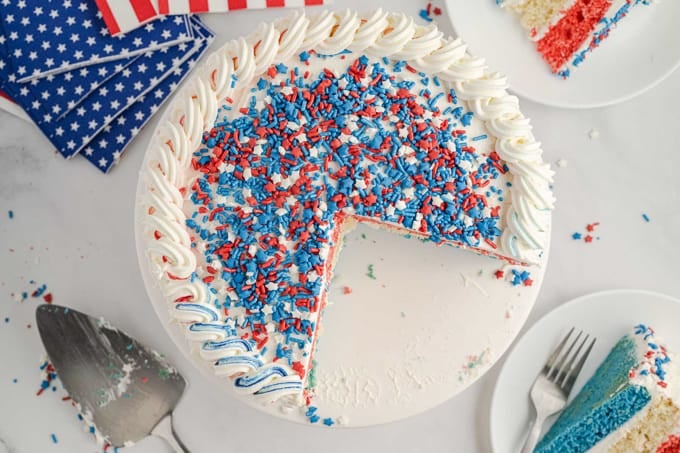
You’re going to LOVE this patriotic spin on classic layer cake.
It takes hardly any extra effort to turn a simple white cake into a seriously impressive 4th of July cake!
SAVE THIS RED, WHITE, AND BLUE LAYER CAKE RECIPE TO YOUR FAVORITE PINTEREST BOARD!
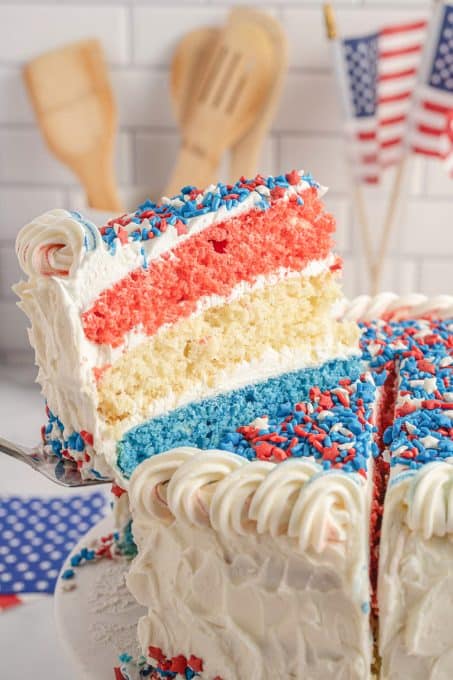
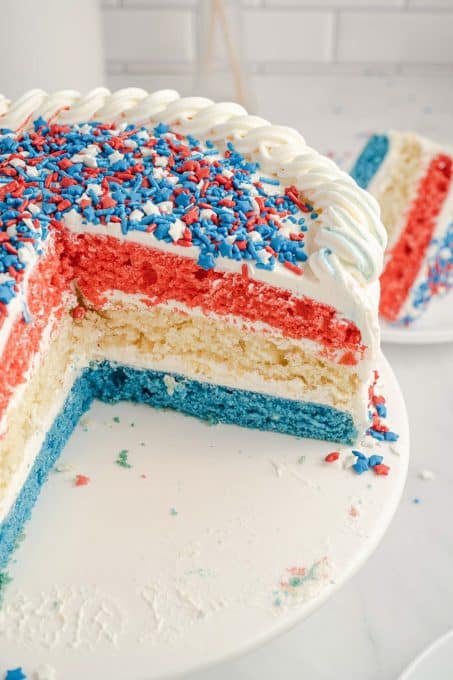
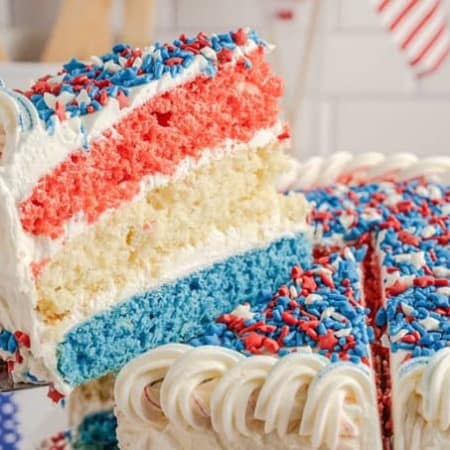
The red, white and blue sprinkles stand out against the smooth white frosting. Cut into the cake and you see layers of red, white and blue reminiscent of stripes on the U.S. flag. Pretty cool, right?
Now that you’ve been sold on how good this Patriotic Layer Cake looks with its’ beautiful layers, you might be thinking, “Great! But how does it TASTE?”
We’ve all experienced some red, white and blue desserts that looked festive but left something to be desired in the taste department. That’s why I’m happy to tell you this red, white and blue layer cake is completely delicious.
Made from scratch, the cake layers have a fluffy crumb and the perfect vanilla flavor. It tastes even better slathered with the thick, creamy vanilla buttercream frosting!
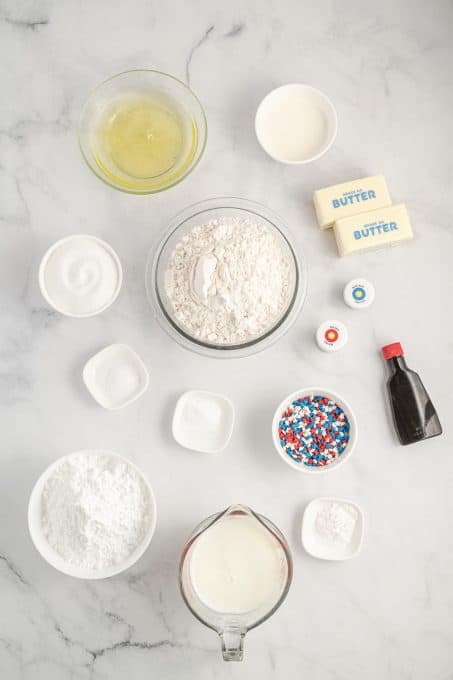
What do I need?
For the red, white and blue cake layers, you will need these ingredients.
- Flour
- Baking powder
- Baking soda
- Salt
- Unsalted butter
- Sugar
- Egg whites
- Clear vanilla extract
- Buttermilk
- Red and blue food gel coloring
Here’s what you will need for the frosting recipe.
- Unsalted butter
- Powdered sugar
- Vanilla extract
- Salt
- Heavy whipping cream
- Red, white and blue sprinkles
What kind of sprinkles are best?
You can use any variety of red, white and blue sprinkles—or even just red and blue sprinkles, since the frosting is white. If you have star shaped sprinkles, feel free to throw a few of those onto the cake for some extra Fourth of July flair!
Can I use salted butter for this cake recipe?
Yes, salted butter works just as well! If you make this would salted butter, I suggest omitting the added salt called for in both the cake batter and the frosting.
Can I use regular vanilla extract?
Clear vanilla extract ensures you have a center cake layer that’s truly white. Regular vanilla extract tastes just as delicious but will give the center cake layer a more yellow appearance.
How do I make it?
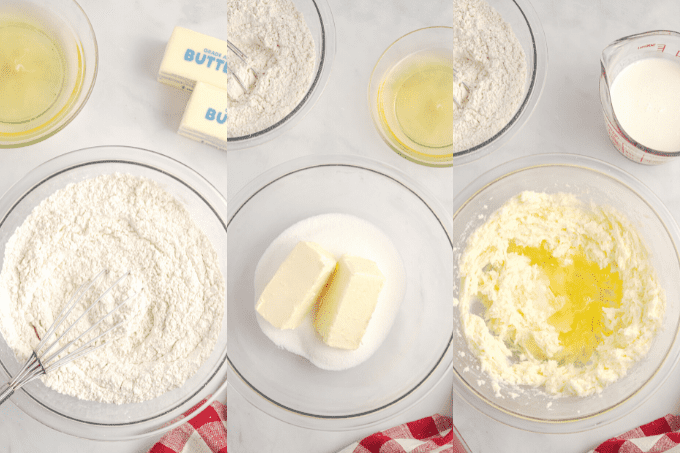
Start by combining the ingredients to form a cake batter. Divide the batter evenly into three bowls. I like to use a kitchen scale to make sure the cake layers end up even.
If you don’t have a kitchen sale, you can use a measuring cup or just do your best to eye-ball it.
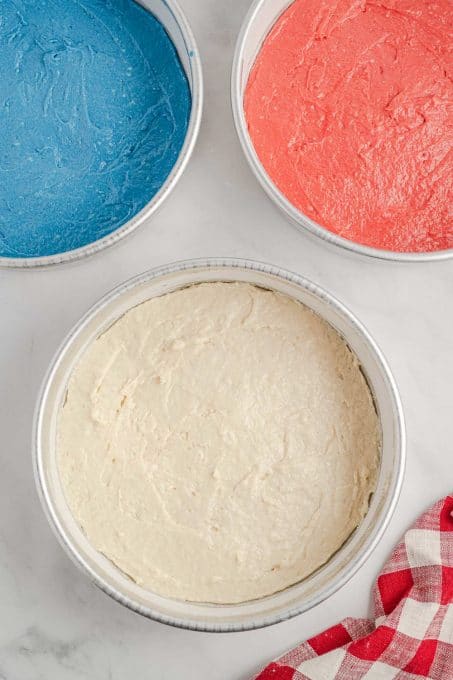
Here’s where we add color to the cake. Add a drop of red food gel to one bowl and in a separate bowl, add a drop of blue food gel. Stir in the food coloring until the color is well mixed.
Pour the red, white and blue cake batter into separate round cake pans. Bake at 350° until a toothpick inserted in the center comes out clean.
Let the cake layers cool completely while you prepare the frosting.
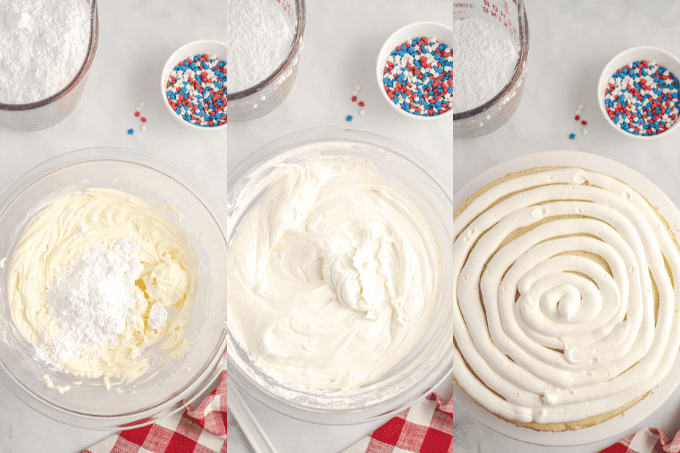
To make the vanilla buttercream, beat butter with an electric mixer until it looks light and fluffy. Beat in the powdered sugar to form a thick icing, then mix in vanilla extract and heavy cream until it reaches a spreadable consistency.
Now you have the cake layers baked and the frosting ready to go. It’s time to assemble the whole thing!
Place the blue cake layer on a cake stand or serving platter. Pipe frosting around the edges and use a spatula to spread it in an even layer over the cake. Repeat with the white layer, then the red layer.
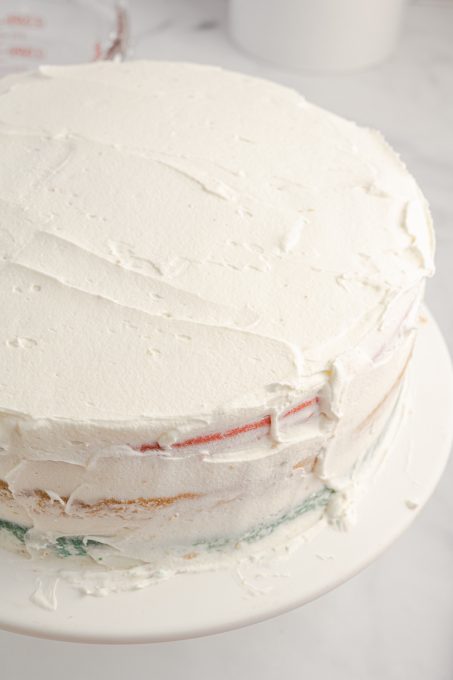
Now, you’ll make a crumb coat by spreading a thin layer of buttercream along the sides of the assembled layer cake. This step allows the final layers of frosting to go on smooth and even for a perfect looking cake.
Put the cake in the freezer for about 20 minutes to harden the crumb coat slightly.
For the final step, spread a thick layer of frosting over the sides and top of the cake with an offset spatula until completely covered. From here, you’re ready to add a few final decorative touches.
4th of July Cake Decorating Ideas
Here’s how I decorated the perfect flag cake for 4th of July.
- Place the remaining frosting in a frosting bag fitted with a star shaped tip.
- Hold the frosting bag in your right hand and slowly rotate the cake with your left hand to pipe buttercream around the whole edge of the cake.
- Press a few sprinkles on the outside of the cake. Add the rest of the sprinkles on top.
How can I add color to the frosting?
If you want a little red and blue in your white frosting, paint two lines of coloring on opposite sides of your piping bag. This will add streaks of color to the frosting without changing the color completely.
How do I store it?
Store your finished Patriotic Cake covered at room temperature for up to 3 days. For longer storage, store it covered in the refrigerator. It will stay good in the refrigerator for up to one week.
Can I make the cake layers ahead of time?
Yes, you can bake the red, white and blue cake layers in advance and keep them frozen until you’re ready to assemble the 4th of July dessert.
Wrap the cakes tightly in plastic wrap or freezer bags. Store in the freezer for as long as 3 months. Let thaw before frosting and serving.
Patriotic Recipes
This July 4th cake is not my first attempt to make a jaw-dropping patriotic dessert!
My all-time favorite Patriotic dessert is this Berry Trifle. With chunks of Pound Cake, fresh blueberries and strawberries, vanilla pudding and whipped cream, it’s a light dessert packed with a whole lot of delicious flavor!
I’ve made this Patriotic Poke Cake countless times. It’s a delicious cake with the fruit fillings, and everyone fights over the first piece. My Pinwheels and Star Cookies get rave reviews too.
If you need a super easy treat the kids will love, add this Patriotic Jello Dessert and these Jello Stars to your list to try next.
Big kids at parties love jello, too, so be sure to put these Red White and Blue Jello Shots on the menu!
And remember to make a red, white and blue breakfast of Buttermilk Pancakes with Blueberries and Strawberries too.
Cake Recipes
After you’ve devoured every bite of this delicious 4th of July Layer Cake, check out these other cake recipes my readers have loved over the years.
- Citrus Layer Cake
- Cinnamon Roll Layer Cake
- Orange Cranberry Coffee Cake
- Pumpkin Chocolate Chunk Cake
- Lemon Marshmallow Poke Cake
- Oreo Cake
- Peanut Butter Upside-Down Banana Cake
- Banana Cake with Cream Cheese Frosting
- Double Chocolate Coconut Cream Filled Bundt Cake
~ FOLLOW ME on SOCIAL MEDIA ~
~ FACEBOOK ~ PINTEREST ~
~ INSTAGRAM ~ TWITTER ~
SIGN UP FOR THE WEEKLY
365 DAYS OF BAKING & MORE
NEWSLETTER BELOW!
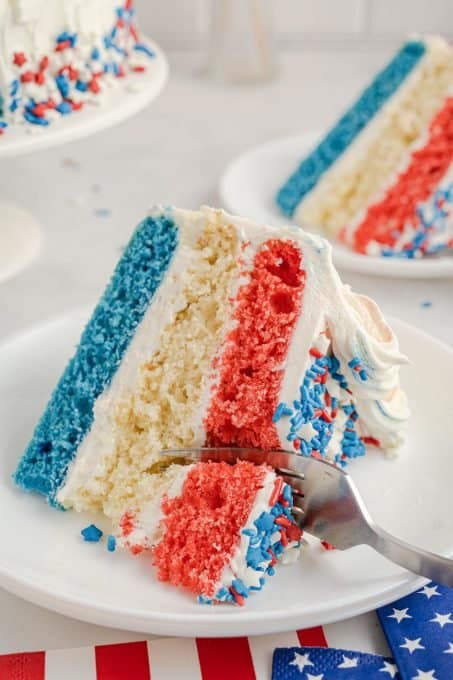
Celebrate the USA with delicious layers of bold red, white and blue cake covered in buttercream frosting and sprinkles in this blue patriotic layer cake recipe that’s sure to be a crowd pleaser!
Patriotic Layer Cake – a red, white, and blue dessert
Ingredients
Cake
- 3 cups all-purpose flour plus extra for dusting cake pans
- 2 teaspoons baking powder
- 1 teaspoon baking soda
- ½ teaspoon salt
- 1 cup unsalted butter room temperature
- 1 cup granulated sugar
- 4 egg whites room temperature
- 2 teaspoons clear vanilla extract
- 1 ½ cups buttermilk or whole milk
- red and blue food gel coloring 1 drop of each
Buttercream Frosting
- 2 cups unsalted butter room temperature
- 6-8 cups powdered sugar
- 2 teaspoons vanilla extract
- ¼ cup heavy whipping cream
- ½ teaspoon salt
- 1 cup red, white and blue sprinkles
Instructions
- Preheat the oven to 350°. Grease three 8 or 9 inch cake pans with butter or shortening and dust with flour. Set aside.
- Start with making the cake batter. In a medium bowl, whisk together the flour, baking powder, baking soda, and salt until well combined.
- In a separate large bowl, cream together the butter and sugar with an electric hand mixer on medium speed until the mixture is light and fluffy.
- Add the egg whites and vanilla extract, and continue beating on medium speed until mixed.
- Pour in about a third of the dry ingredients to the wet ingredients, and beat on low speed until just combined.
- Add the rest of the dry ingredients along with the buttermilk, and fold together until barely combined.
- Divide the batter evenly between 3 small bowls. A digital scale will make this much easier than just eyeballing it.
- Add about 1/8 teaspoon (or a drop) of red gel food coloring and blue gel food coloring to two separate bowls of batter, and stir until the colors are well mixed.
- Pour each bowl of batter into the three cake tins. Bake in the preheated oven for 25 minutes, or until a toothpick inserted into the middle of the cakes comes out clean. Rest the cakes on a cooling rack until they reach room temperature.
Buttercream Frosting
- While the cakes are cooling, make the buttercream frosting. In a large bowl, cream the butter with an electric hand mixer on medium speed for about 3 minutes, or until the butter is very smooth.
- Gradually add the powdered sugar, and continue mixing with the hand mixer until the frosting is thick and stiff.
- Add the vanilla extract, salt, and heavy whipping cream, and continue beating until everything is mixed.
- Transfer the frosting to a piping bag with a large round tip. Place the blue layer of the cake onto a platter or cake stand, and pipe even circles around the top of the blue layer. Spread the frosting out with a spatula. Repeat this step with the white and red cake layers.
- Once you have spread out the frosting on the top red cake layer, spread a thin layer of frosting on the edges of the cake. This will be your crumb coat. Place the cake in the freezer for 20-30 minutes or until the crumb coat is slightly hard.
- Spread a thicker layer of frosting on the edges of the cake, and pipe some of the frosting on top around the edge in a piping bag with a large star piping tip.
- Press some sprinkles along the bottom edges of the cake, and pour the rest of the sprinkles on top.
- Serve at room temperature.
Leave A Reply!