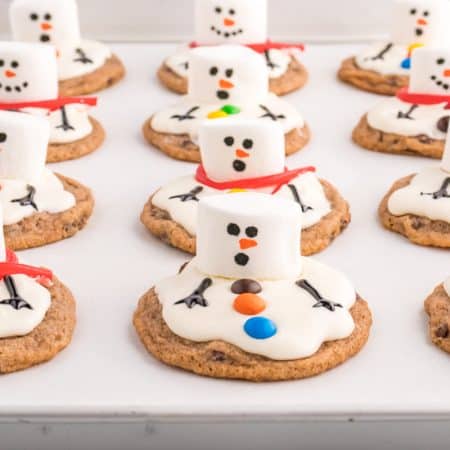
Snowman Cookies are holly jolly treats made with hot cocoa mix and marshmallow frosting. Shaped like melting snowmen, these festive cookies are sure to put a smile on your face this holiday season and will be a cute addition to any holiday cookie tray!

The 12 Days of Cookies are in full swing! I’ve been baking up a storm these past few weeks filling the cookie jars with everything from Christmas tree meringues to addictively good buckeyes and for the finale, I present to you these melting snowman cookies!
Welcome to 2023’s 12 Days of Cookies!
These Melting Snowmen are Day 12 of our 12 Days of Cookies!
Be sure to check out all of the other days for more goodies!
Day 1 – Cherry Biscotti
Day 2 – Sour Cream Cookies
Day 3 – Chai Spritz Cookies
Day 4 – Millionaire Bars
Day 5 – Chocolate Chip Potato Chip Cookies
Day 6 – Nana’s Oatmeal Cookies
Day 7 – No Bake Peanut Butter Cookies
Day 8 – Coffee Cake Cookies
Day 9 – Meringue Christmas Trees
Day 10 – Cookie Sticks
Day 11 – Christmas Buckeye Recipe
Day 12 – You’re on it!
SAVE THESE LITTLE SNOWMAN COOKIES TO YOUR FAVORITE PINTEREST BOARD!

Good thing I never get tired of cookies! Or the way they make my house smell as they’re baking all throughout December.
It’s impossible for me to pick my favorite Christmas cookie recipe, but these snowman cookies really are something special. The recipe starts with a thin, crisp chocolate cookie base. You top it with thick marshmallow creme frosting and real marshmallows decorated to look like snowmen!
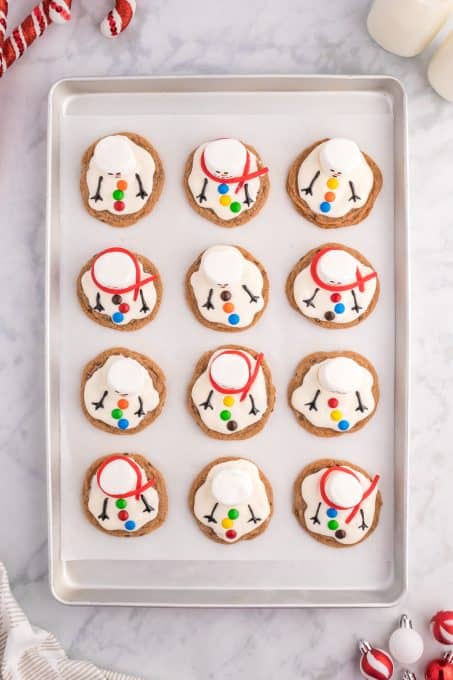
When you arrange them the right way, the snowman looks like it’s melting all over the cookie. The results are pretty adorable if I do say so myself.
Wondering how they taste? Melted Snowman Cookies taste like hot chocolate in cookie form. They have the perfect combination of rich cocoa and marshmallow flavor. Everyone is going to rave over these cute cookies. You can serve them on their own or as part of a full cookie spread at your holiday party. But the best part, these fun cookies are a guaranteed crowd pleaser!
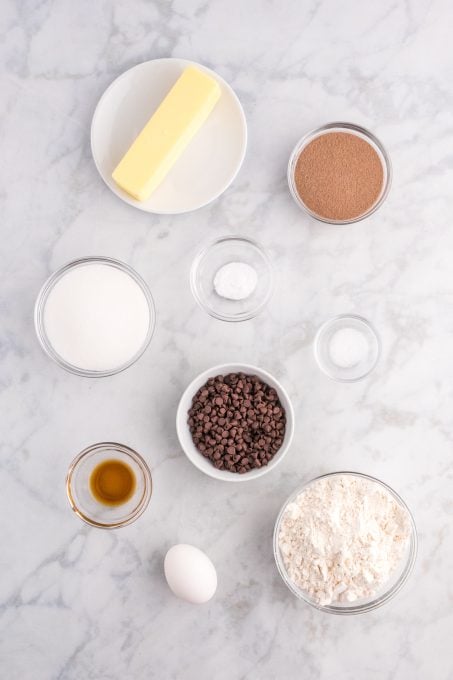
What ingredients do I need for these little snowmen?
For the chocolate cookies, you will only need a handful of ingredients:
- Butter
- Sugar
- Egg
- Vanilla extract
- All purpose flour
- Hot chocolate mix – The packets of powdered milk chocolate cocoa mix work perfectly here.
- Baking soda
- Salt
- Mini chocolate chips – I used semi-sweet but milk chocolate morsels would also be tasty.
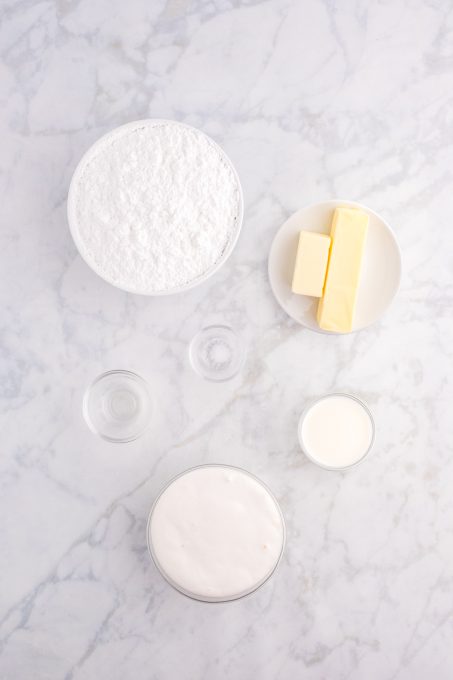
To make the marshmallow icing, you’ll need these ingredients:
- Butter
- Marshmallow Fluff – This is a soft marshmallow spread sold in jars, usually in the peanut butter or baking aisle.
This is the ONLY brand I use as it’s perfect for making my Fluffernutter Sandwich, Fluffernutter Dip, and Fluffernutter Cookies! - Clear vanilla extract – Using clear extract keeps the frosting white so it looks like snow.
- Salt
- Milk – Use skim, fat free, whole or whatever you have on hand to thin the frosting.
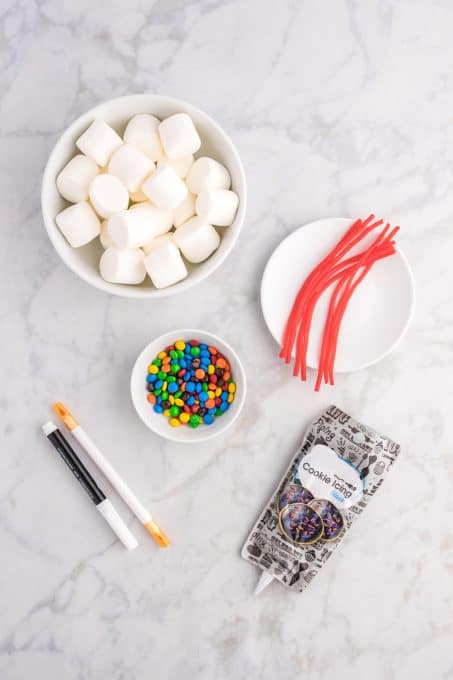
You’ll also need a few more ingredients to decorate the snowman cookies. I used:
- Marshmallows – To make the snowman “heads”.
- Pull ‘n peel licorice – For the snowmen’s scarves.
You can use the rest to make these Cornflake Wreaths! - Mini M&Ms – To make buttons.
- Black and orange cookie icing – I like using edible markers for drawing the eyes and ears on the snowmen. Regular cookie icing works too.
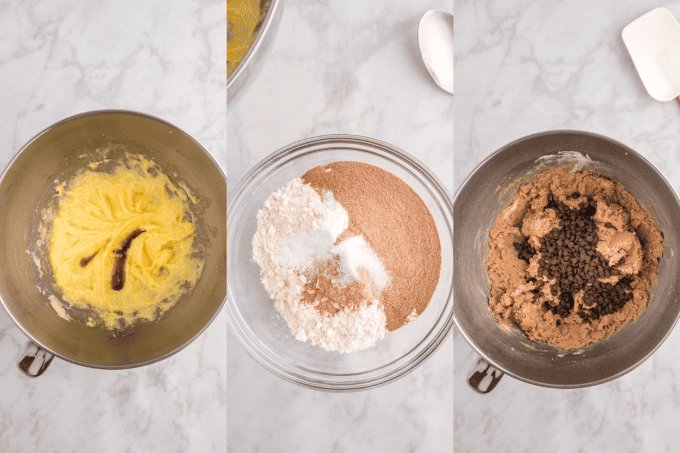
How to Make Snowman Cookies
There are a few steps involved in making snowman cookies but the process itself is easy!
First, make the hot chocolate cookies. Using a stand mixer or electric mixer, combine the butter, sugar and other wet ingredients in a large mixing bowl. In a separate bowl, whisk flour, hot chocolate powder, baking soda, and salt together.
Add the dry ingredients to the butter mixture and mix to form a soft dough. Fold in the mini-chocolate chips last. Drop the dough by the spoonful onto a large cookie sheet and bake cookies for 10 – 12 minutes or until the edges are a little bit crispy. Keep in mind that the cookies will be flat. They’ll look a little odd at this stage, but the flat surface makes them so much easier to decorate later.
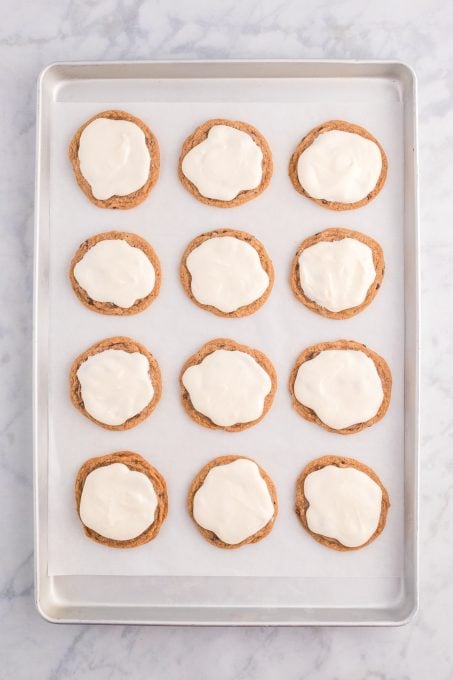
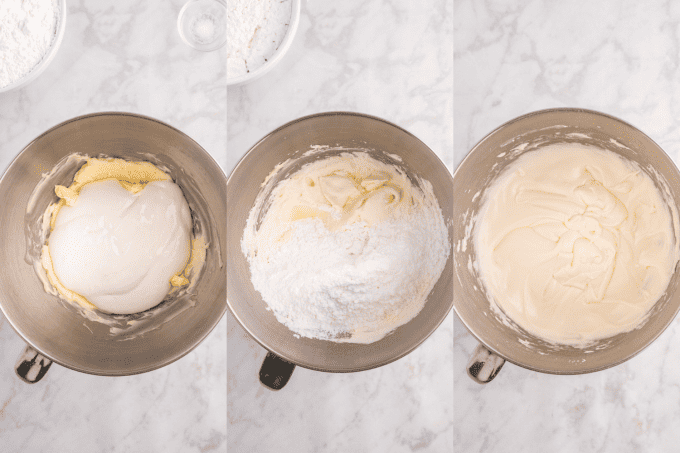
Cool cookies and in the meantime, beat together the icing ingredients. Spread or use a piping bag to pipe the icing onto the top of the cookie. Leave a little bit of space between the icing and the edges of the cookie. Don’t worry about making the edges neat or even here. A little waviness helps the icing look more like it’s melting away!
The Wicked Witch from Wizard of Oz just popped into my head, “HELP ME, I’M MELTING!!!” 😂
How to Decorate These Adorable Snowman Cookies
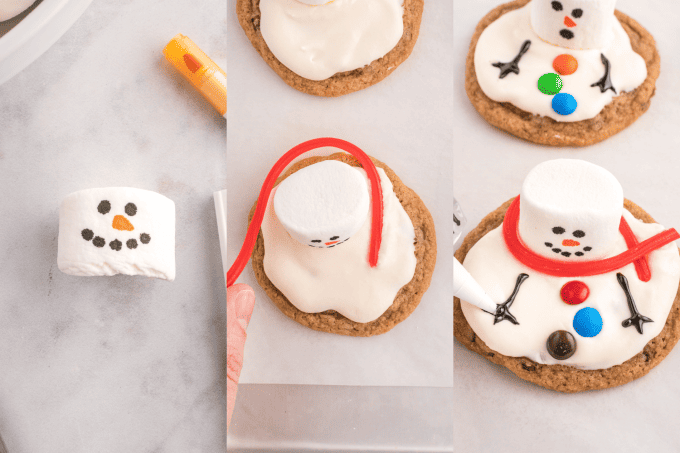
Here comes the fun part. Making cookies look like melting snowmen is easier than you might think. Cut off a slice from the bottom of each marshmallow. This will be the snowman head.
Now use your black edible marker to draw eyes and mouth onto the marshmallow. Being precise takes a little practice here, but never fear. If your snowman face looks wonky you can always chalk it up to the fact that he’s melting. It doesn’t have to be perfect.
Now use your orange icing to draw a “carrot” nose onto your snowman’s face. Press the marshmallow onto the top half of the frosted cookie. Wrap a string of licorice around the base of the marshmallow as its “scarf.” Then place three mini M&Ms down the center of the cookie to create “buttons.” Last but not least, draw “arms” and little hands on the cookie with the black icing.
The black cookie icing gives these the most classic snowman look but, of course, you can play around with other colors too. The creativity is part of the fun of cookie decorating! If you don’t have any edible markers handy, just do your best with the tubes of cookie icing. Your snowman shaped cookies are going to make everyone smile all the same and the whole family will love them!
See the recipe card below for the complete list of ingredients and full instructions.
Recipe FAQs
Can I make the cookies ahead of time and decorate later?
Yes, you can make the chocolate snowman cookies in advance and store them in an airtight container until you’re ready to decorate. They should stay fresh for several days.
If you’re planning a cookie decorating party, these snowmen cookies are the perfect choice to prepare ahead of time. Bake the cookies themselves the day before then let everyone have fun assembling their own “melting” snowmen cookies.

Can I use a different kind of icing?
The marshmallow cream icing is amazing when combined with the familiar hot cocoa flavor of the cookies, but you can use other types of icing if you prefer. Royal icing or buttercream can also work. The taste will just be different.
How to store decorate snowman cookies?
Store the decorated melting snowman cookies tightly covered at room temperature. They don’t need to be kept refrigerated. I wouldn’t recommend freezing snowman cookies. Freezing and thawing releases extra moisture which can make the icing run and ruin the look of the snowmen’s faces.

More Favorite Christmas Cookies
No holiday dessert table is complete without a few different types of Christmas sugar cookies! If you’re looking for a few new cookies to try this season, I’ve got you covered.
This great recipe for Peppermint Sugar Cookie Cups has the classic sweetness of traditional sugar cookies with a pop of cooling peppermint. They’d make a great accompaniment to a platter full of snowman cookies! If it’s chocolate you’re craving, these Chocolate M&M Christmas Cookies won’t disappoint. You can’t resist the crunchy M&M candies inside every bite.
For more eye catching cookie inspiration, check out these Stained Glass Cookies. They’re so easy to make with jolly rancher candies and a soft cut out cookie dough. I get rave reviews for these Christmas Sprinkle Cookies too!
Revisit last year’s 12 Days of Cookies round up for even more Christmas baking inspiration.

FOLLOW ME
FACEBOOK ~ PINTEREST
INSTAGRAM ~ TWITTER
YOUTUBE
Keep an eye out for more of my easy recipes each week!
Melted Snowman Cookies
Ingredients
For the Hot Cocoa Cookies:
- ½ cup butter softened
- ½ cup granulated sugar
- 1 large egg
- ½ teaspoon pure vanilla extract
- 1 ¼ cups all-purpose flour
- ¼ cup hot chocolate powder I used milk chocolate cocoa mix
- ½ teaspoon baking soda
- ¼ teaspoon kosher salt
- ½ cup mini chocolate chips semi-sweet or milk chocolate
For the Marshmallow Cream Icing:
- ¾ cup butter softened
- 1 ½ cups marshmallow cream
- 2 ¼ cups powdered sugar
- ½ teaspoon clear vanilla extract to keep the icing white
- pinch of kosher salt
- ¼ cup milk
For Decorating:
- 18 regular marshmallows
- Pull n’ peel red licorice cut into 6 ½-inch long strings
- Mini M&M’s Regular ones will be too big for this size cookie
- Black cookie icing or black edible writing marker
- Orange icing or writing marker
Instructions
- Preheat the oven to 350°F. Line two baking sheets with parchment paper.
To make the cookies:
- In a large mixing bowl, cream together the softened butter and granulated sugar until light and fluffy. Add the egg and beat well. Mix in the vanilla extract.
- In a separate bowl, whisk together the all-purpose flour, hot chocolate powder, baking soda, and salt.
- Gradually add the dry ingredients to the wet ingredients, mixing until a soft cookie dough forms. Stir in the mini chocolate chips.
- Drop 1 ½ rounded tablespoons of cookie dough onto the prepared baking sheets, spacing them about 2 inches apart.
- Bake for 10-12 minutes or until the cookies are slightly crisp around the edges (the cookies will be flat, but this is best for decorating).
- Remove the cookies from the oven and let them cool completely.
To make the icing:
- In a medium-sized mixing bowl, beat the softened butter until creamy.
- Add the marshmallow cream and continue to beat until well combined.
- Gradually add the sifted powdered sugar, vanilla extract, and a pinch of salt. Beat until the icing is smooth and fluffy. Add the milk a little at a time until the icing is smooth and easily spreadable (it should slowly drip off the paddle when lifted). Adjust the consistency by adding more powdered sugar to thicken, or more milk to thin, but only a teaspoon at a time.
To decorate:
- Once the cookies have cooled completely, spread or pipe the marshmallow cream icing onto the tops of the cookies using a spoon or plastic bag with the corner cut off. Smooth it using the back of a spoon. Try to leave random space between the icing and edge of the cookie while spreading to create a “melting snow” effect.
- Cut the bottom ¼ off of the marshmallows (to make them look more like they’re melting) and draw button eyes and mouths with the black edible marker or icing. Then draw a carrot nose with the orange edible marker or icing.
- Place the marshmallow in the icing on the upper half of the cookie, nearly at the edge of the icing. Add the licorice scarf by putting one end onto the icing, then wrapping it around the marshmallow completely.
- Add 3 mini M&M’s for buttons, then draw arms with black icing (I used a premade icing bag that has the tip included).
- Enjoy your adorable hot cocoa melted snowman cookies!
Notes
- See blog post for tips, tricks and substitutions.
- The nutritional value for this recipe is approximate as the nutritional value for the decorations was calculated with regular size licorice twists, regular size M&Ms, and black and orange icing.

Leave A Reply!