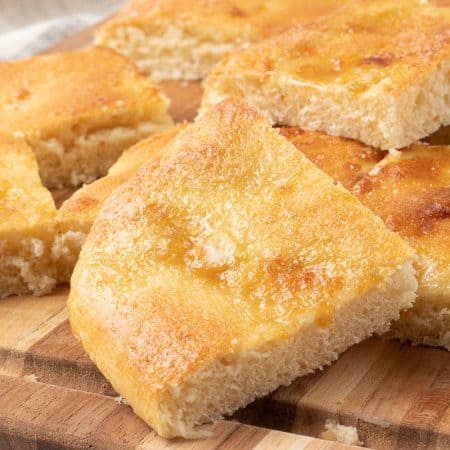
Coca Bread is a delightful Spanish yeast bread reminiscent of a thin-crust pizza, topped with a tempting array of sweet or savory ingredients. Today I’m sharing a sweet version of Coca Bread that you’ll want to make again and again!
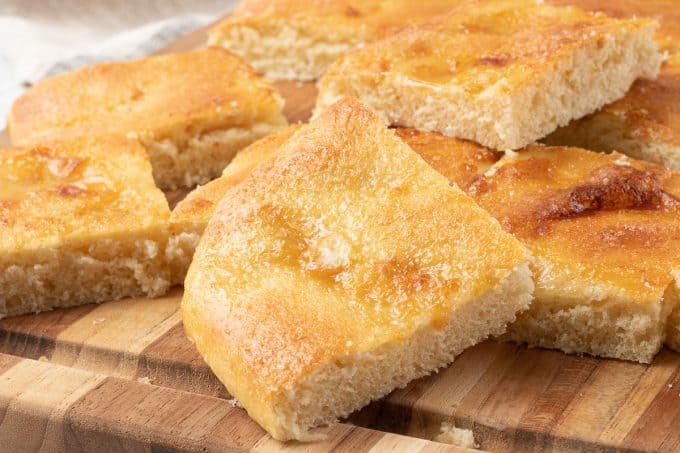
I’ve had the urge to make some bread lately. I think it’s because I haven’t done it in a while and need that tactile sensation – to really get in there and be “one” with the dough. This one was perfect because of the kneading involved. For some reason, I was hesitant to get my hands all messy today and stood there for a few minutes just looking at the dough, waiting.
But once I was in, there was no turning back!
It’s fun to try something new. If you’re not a seasoned bread baker, this recipe is a great place to start!
SAVE THIS RECIPE FOR SWEET COCA BREAD TO YOUR FAVORITE PINTEREST BOARD!
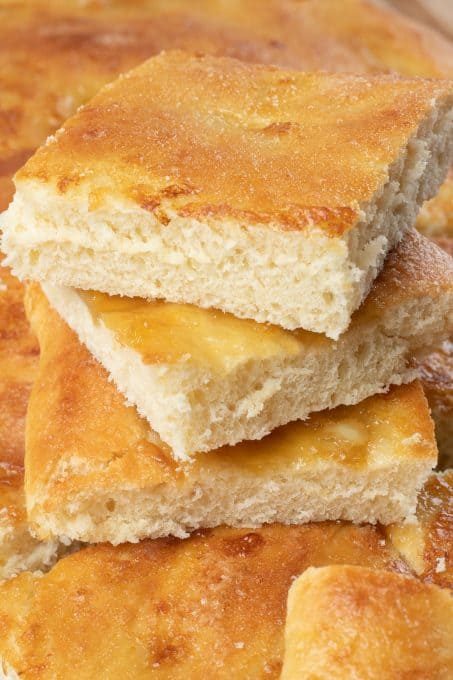
All About Coca Bread
If you’ve never had this delicious bread before, you’re in good company! Coca bread is a traditional Spanish dish that resembles a thin-crust pizza. It typically consists of a crispy bread base topped with a variety of ingredients, including vegetables, meats, seafood, and herbs. The dough is often rolled out thinly and baked until golden and crispy, creating a perfect canvas for the toppings.
Coca bread can be served as an appetizer, snack, or even a light meal, making it versatile and delicious! Trust me, once you try this recipe, you’ll be hooked! So, grab your apron, and let’s dive into the delicious world of Coca Bread!
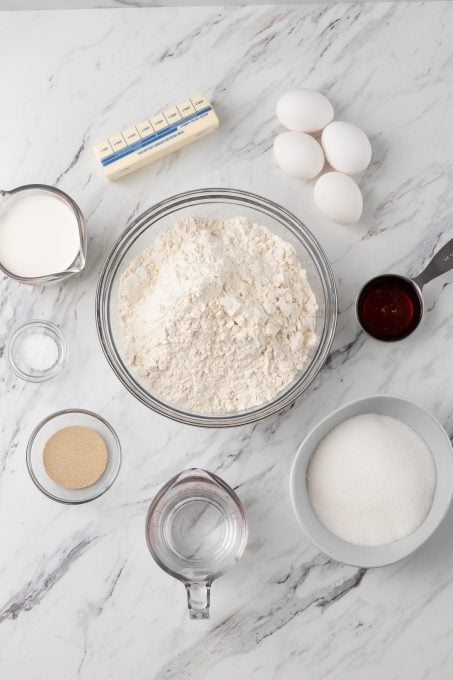
Coca Bread Ingredients
Here’s what you need to make this Spanish sweet bread:
- Active dry yeast
- Warm water
- Sugar
- All-purpose flour
- Kosher salt
- Whole milk (room temperature)
- Large eggs
- Unsalted butter
- Honey
You can find the exact amounts of these pantry staples in the recipe card below!

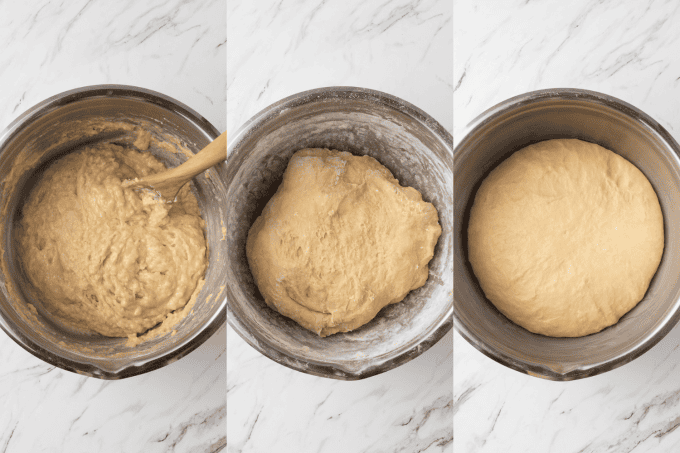
How to make Spanish Sweet Coca Bread
This recipe makes two loaves of this delicious bread! Give one away or freeze it for later.
- In a small bowl, combine 1 tablespoon plus 1 teaspoon of yeast with the warm water; let the yeast mixture stand until foamy, about 10 minutes.
- Combine 1 cup of sugar, 4 cups of flour, and salt in a large bowl. With a wooden spoon, stir in the yeast mixture, milk, 3 eggs, and ½ cup of melted butter into the dry ingredients until combined. Using your hands, work the remaining flour into dough ¼ cup at a time, until the dough is no longer sticky.
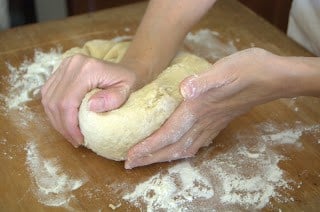
- On a lightly floured surface, knead the dough ball until it develops a smooth surface with a satiny texture and springs back when you poke it with your finger. This will take about 5 minutes.
- Form the dough into a ball, and place dough into a lightly greased bowl, rotating the dough in the bowl to coat it completely. I like to use a drizzle of olive oil, but you could also use butter.
- Cover with plastic wrap and let it rise in a warm place for about an hour until it is doubled in size.
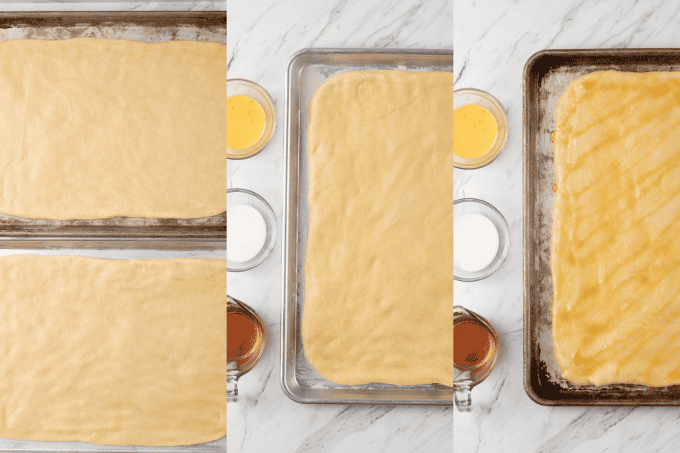
Shape and Bake the Bread
- Preheat the oven to 400ºF. Generously grease two baking sheets with some of the melted butter. Turn the dough out onto a clean work surface and cut it in half.
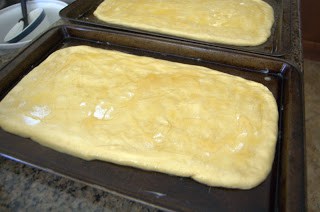
- Place half of the dough on each prepared baking sheet and press the dough out into two 8 X 17-inch rectangles with a rolling pin or your hands. Allow the dough to sit and rise (proof) for 15 minutes.
- In a small bowl, whisk together the remaining egg and 1 tablespoon of water. Brush the egg wash all over each loaf.
- Generously sprinkle the surface of the dough with the remaining ¼ cup sugar, and drizzle the honey all over the loaf.
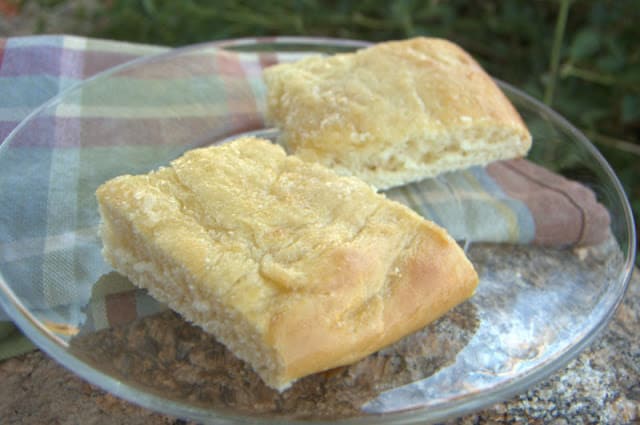
- Bake until golden and crispy, about 18 minutes. Transfer the bread to wire racks to cool, then slice and serve!
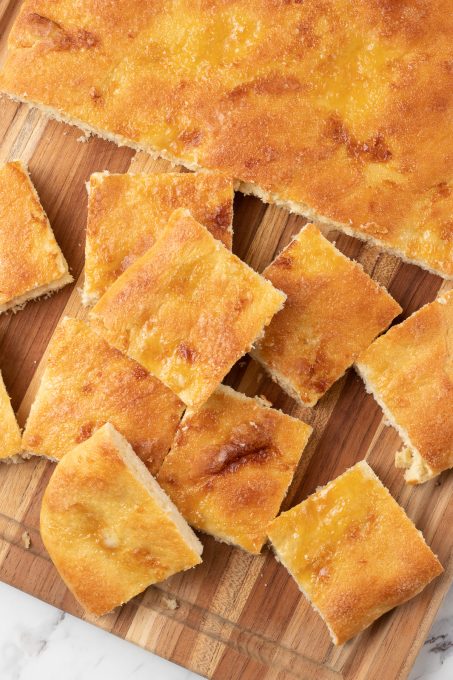
OH. MY. GOODNESS! This bread is DEFINITELY being added to my list of keepers!!
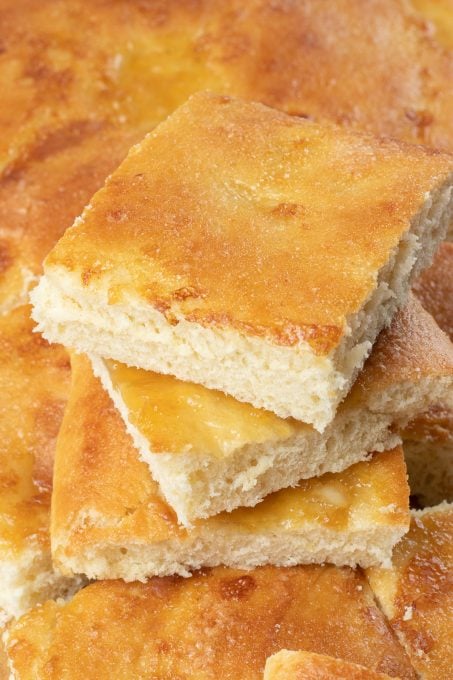
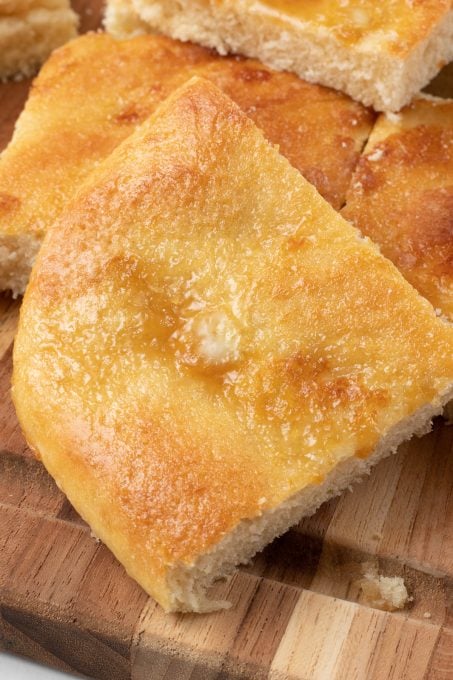
I love honey on bread or on rolls, so I knew when I read HONEY in the ingredients that this bread must be something special. The honey soaked into the bread, the sugar melted, and with the two of them combined…oh, it was just HEAVEN, especially when it was warm right out of the oven!
I HIGHLY recommend that you give this a try. I’m sure you, your family, and friends will absolutely love it! That is of course, if you choose to share it!
How to Store Leftover Coca Bread
This bread will keep fresh at room temperature for 3-4 days when wrapped well. Keep it in an airtight container or wrapped tightly in plastic wrap.
Can you freeze Coca Bread?
Yes, you can freeze coca bread, but make sure to store it properly. Allow it to cool completely to prevent any condensation from forming. Then wrap it well in plastic wrap or aluminum foil, or place it in a freezer bag. Remove any excess air.
Store it flat in the freezer for up to 3 months. Thaw in the refrigerator overnight, then reheat it in a 350-degree oven for 8-10 minutes or until warmed through and crispy!
Try these breads from other cultures, too!
- This French Bread recipe makes four small loaves of delicious, crusty bread!
- If you want good Italian bread, you have to try my Grandma’s Italian Bread recipe. It is so good and easy to make!
- Another famous Italian bread is Focaccia, and this Rosemary Focaccia is perfect! Add additional toppings to make it your own, too!
- Top of the mornin’ to you! This Irish Soda Bread is a great quick bread for your St. Patrick’s Day dinner or anytime you want a fast, delicious loaf of bread!

FOLLOW ME
FACEBOOK ~ PINTEREST
INSTAGRAM ~ TWITTER
YOUTUBE
Keep an eye out for more of my easy recipes each week!
Want to Save This Recipe?
Enter your email & I’ll send it to your inbox. Plus, get great new recipes from me every week!
By submitting this form, you consent to receive emails from 365 Days of Baking and More.
Coca Bread
Ingredients
- 1 tablespoon active dry yeast
- 1 teaspoon active dry yeast
- ⅓ cup warm water About 110°F.
- 1 ¼ cups sugar
- 5-6 cups all-purpose flour
- 1 teaspoon kosher salt
- 1 cup whole milk room temperature
- 4 large eggs divided
- ½ cup unsalted butter plus more for bowl and pans
- ¼ cup honey for drizzling
Instructions
- In a small bowl, combine the 1 tablespoon and 1 teaspoon of yeast with the warm water; let stand until foamy, about 10 minutes.
- In a bowl, combine 1 cup of the sugar, 4 cups of flour, and salt. With a wooden spoon, stir in yeast mixture, milk, 3 eggs, and ½ cup of melted butter until combined. Using hands, work remaining flour into dough ¼ cup at a time, until the dough is no longer sticky.
- On a lightly floured surface, knead the dough until it develops a smooth satiny texture and springs back when you poke it with your finger. This will take about 5 minutes.
- Form the dough into a ball, and place in a lightly buttered bowl, rotating the dough in the bowl to coat it with butter.
- Cover with plastic wrap, and let rise in a warm place for about an hour until it is doubled in size.
- Preheat the oven to 400ºF. Generously grease two baking sheets with some of the melted butter. Turn the dough out onto a clean work surface, and cut in half.
- Place half of the dough on each prepared baking sheet, and press into two 8 X 17-inch rectangles. Allow the dough to sit and rise (proof) for 15 minutes. In a small bowl, whisk together the remaining egg and 1 tablespoon of water. Brush all over each loaf.
- Generously sprinkle the dough with the remaining ¼ cup sugar, and drizzle with the honey.
- Bake for about 18 minutes, until golden and slightly crispy. Transfer the breads to wire racks to cool.
Notes
Nutrition
This post was originally published on June 24, 2011 and was Day 144 of my original 365 Days of Baking. Below is an excerpt from the original post that I wanted to keep. It has been updated in format and with pictures on July 10, 2024.
I witnessed something truly beautiful today.
I was on the StairMaster at the gym this afternoon, when I looked over to my left and saw an elderly woman with a cane taking great care to place one foot in front of the other. With her right arm so close to her body, I was thinking she must have suffered a stroke.
It took her about 7-10 minutes to walk 5 feet from me.
Her husband in the meantime had been preparing the stationary bike to my right, adjusting the seat and making the foot straps “just so”. So diligent in the task at hand, he didn’t go over to assist her or see if she was doing ok. He just let her be, probably knowing it was something she needed to do for herself.
She had just steps left to get to the bike when her husband began making motions and cheering her on to take those last few steps. He was SO excited that she had made it. He didn’t speak, nor did she. It appeared that one if not both of them were deaf.
As she saw him smile and become excited that she was nearing her goal, the biggest, most beautiful smile lit up her face.
And it wasn’t just any smile.
It was a smile that portrayed years of marriage blessed both with struggle and happiness and yet at the same time, it was the smile of a teenager newly in love. It was so warm and tender, and truly, truly genuine. These two were in their late 80’s, if not 90’s and the love and affection between them was still so apparent. And their non-verbal communication made it all the more touching.
It made my heart melt.
I don’t know, I could be reading into things about her health and their relationship that aren’t really there.
But watching them, I was able to see a glimpse of the future – that of mine with my husband.
Mr. 365 and I in our 90’s. Him cheering me on, always being upbeat and goofy, and me looking at him with a love so deeply rooted that it goes beyond words. And smiling, sweetly, sweetly smiling with a sparkle in my eyes only for him.

Comments & Reviews
I love this post! The story and the bread are both so sweet!
What a beautiful story. After 15 years together my husband roots me on. I can only dream that at 90 after our daughter is grown and we are so much more full of life’s experiences that we will have that kind of love.
So, the bread… Wow! I am a bit intimidated by bread. I can’t explain it. I can make a 9 layer cake and not bat an eye at the 12 hours of work and detail involved. Give me a batch of rolls to make and I panic. Hope to give this a try real soon! It looks beautiful.
Thank you, ladies!
Donna, 9 layers and 12 hours??!!! I bow to you, girl!! I’ve been intimidated by bread myself, but as you know with your cakes, practice makes perfect and you’ll get better with more “hands-on” (hah-pardon the pun. Ok, that was bad.) experience. It was pretty easy to make and kneading is actually quite therapeutic, and this is probably a good bread to try first because you don’t have to worry about it looking like a typical raised loaf of bread when it comes out of the oven. Let me know how it goes it you try it. Good luck!
I so love reading your posts! What an amazing story for you to be able to share! I love it! What an inspiring Couple! You are blessed – because YOU noticed what was happening in front of you. So many would just look past this situation! I too, cannot wait, for my Hubby and I to grow old with one another. We are wondering who will be in the Wheelchair, and who will be with a walker? 😉 Regardless, we look forward to it. Each day is a gift. Thank you for sharing! Oh, and the bread sounds pretty dee-lish!
Thank you, Tina! Ironically, the song that came on my iPod after seeing that occur was Martina McBride’s ‘Blessed”. How awesome is that? HUGS!
Lynne! This nearly made me cry! LOL!! Crying while making bread. I love this love story. Unconditional love like this must be hard to find. She and him are very lucky dispite their health issues.
What a beautiful story! If that story doesn’t touch your heart I couldn’t imagine what would. I have yet to make this bread but I certainly am going to try it. I normally use my husband and daughter as my “test guinea pigs” anytime I make something new. ( I’m my own worst critic) I will tell them the story you included in case I do something wrong. I’m guaranteed a smile either way! Thank you for the story and the recipe.