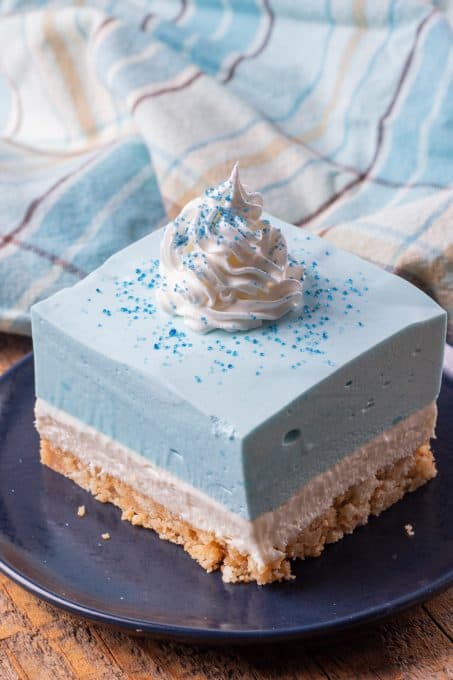
Blue Raspberry Cream Dream Bars make a perfect sweet treat for summer or a gender reveal party! Classic raspberry cheesecake bars are tinted blue with a creamy whipped topping and blue sprinkles in this easy, fun, and no bake dessert recipe.
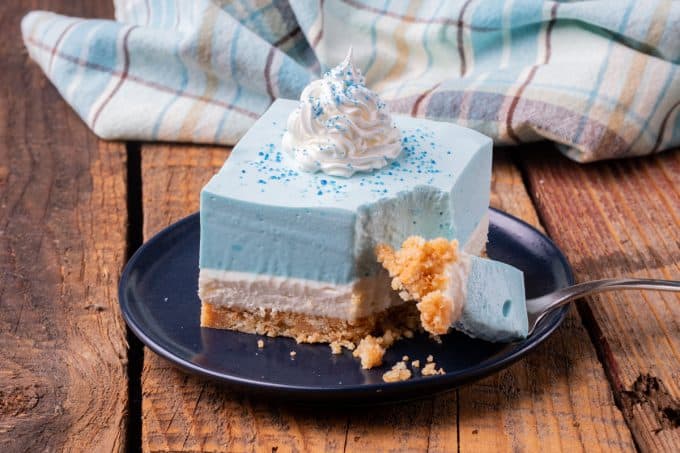
Looking for a blue gender reveal dessert idea? Everyone LOVES dream bars!
We took our popular Raspberry Cream Dream Bars recipe and gave them a blue twist! Whether you’re celebrating the coming arrival of a baby boy, or just looking for that perfect blue raspberry dessert, you’re going to love these no bake bars.
SAVE THIS BLUE RASPBERRY CHEESECAKE RECIPE TO YOUR FAVORITE PINTEREST BOARD!
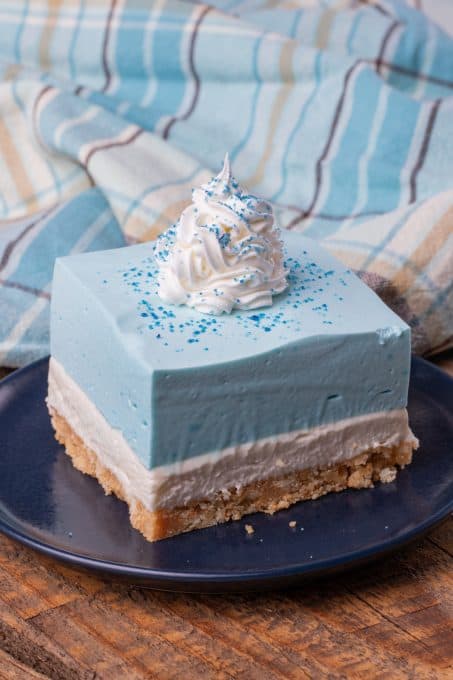
The tangy sweet raspberry filling is a match made in heaven for the creamy cheesecake. Served cold, they taste just like one of those blue raspberry novelty desserts I got from the ice cream truck as a kid.
Did you know that blue raspberries don’t really exist? Blue raspberry desserts are just raspberry desserts with blue coloring added! The pop of bright blue color makes the cheesecake bars look a little extra special.
Best of all: Blue Raspberry Dream Bars are so easy to make!
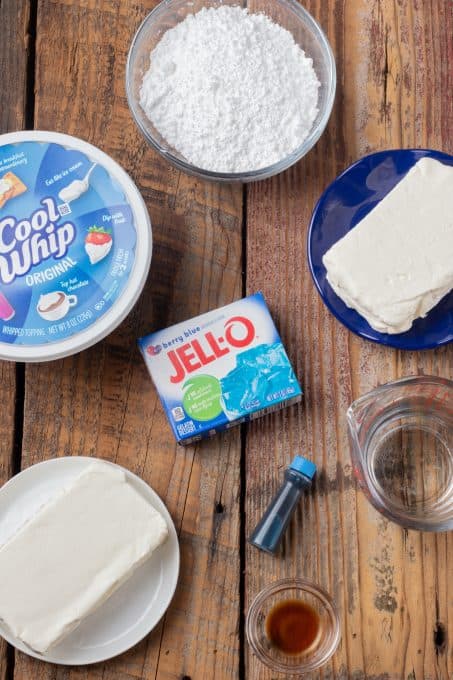
WHAT DO I NEED?
Like all of my dream bar recipes, these cheesecake bars consist of a few components.
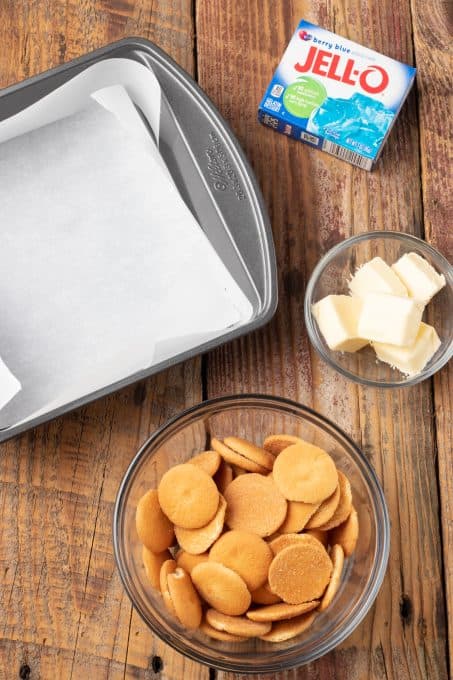
For the crust you will need:
- Nilla wafers cookies
- Unsalted butter
For the blue raspberry JELL-O layer you will need:
- Blue raspberry gelatin
- Boiling water
- Cold water
- Cream cheese
- Blue food coloring
- Raspberry extract – optional
I did make these without the raspberry extract, but you can add a teaspoon if you’d like more of a raspberry flavor. - Cool Whip – Or use my homemade stabilized whipped cream instead
For the cheesecake layer you’ll need these ingredients:
- Cream cheese
- Powdered sugar
- Vanilla extract
- Cool whip – plus extra for serving!
- Blue sugar or sprinkles for decorating
How do I make this Blue Raspberry dessert?
STEP 1. Make the cheesecake crust.
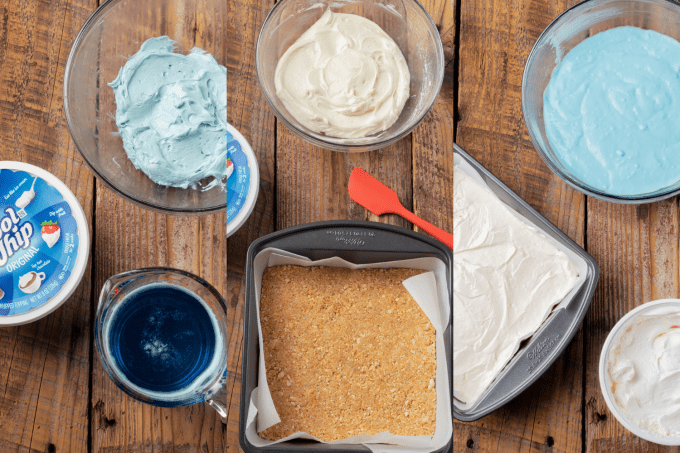
First, pulse the Nilla wafers in a food processor to form crumbs. Add melted butter and mix with a spatula to combine.
Now press the mixture into a baking dish lined with parchment paper. Place the crust in the freezer to chill while you prepare the rest of the raspberry dream bar layers.
STEP 2. Make the raspberry cream filling.
Start by dissolving the gelatin powder in boiling water. Then whisk in cold water and chill the JELLO mixture in the fridge for about 10 minutes.
Pro tip: You want the JELLO to cool down but NOT set! Be careful not to overchill or your filling won’t come together.
While the JELLO cools, beat together cream cheese with raspberry extract and blue food coloring. Gradually incorporate the cooled JELLO mixture and mix to combine. It may take a while, but the more slowly you add the blue gelatin to the cream cheese mixture the less clumps of gelatin you’ll get.
Let this filling chill in the refrigerator for one hour. It will thicken and cool to the perfect consistency!
STEP 3. Make the cheesecake layer.
For the cheesecake, beat together cream cheese with powdered sugar and vanilla extract. Fold in one cup of cool whip.
STEP 4. Assemble!
It’s time to put all those tasty layers together to make the best ever blue raspberry cream cheesecake bars!
- Dollop the cheesecake over the frozen crust. Spread it around evenly to form a single layer.
- Fold the remaining Cool Whip from the tub into the chilled blue raspberry cream mixture.
- Gently pour the raspberry cream onto the cheesecake layer and spread evenly.
- Place into the refrigerator overnight or for a minimum of 6 hours.
Tips for Slicing and Serving
The parchment paper makes cutting the bars easy and fuss free. Grasp the corners of the parchment to lift all of the uncut bars out of the pan at once.
Run a large knife under hot water, carefully dry it off, and then slice through the bars, repeating with each cut. This will help make clean cuts that create fewer crumbs–and make the bars look picture perfect.
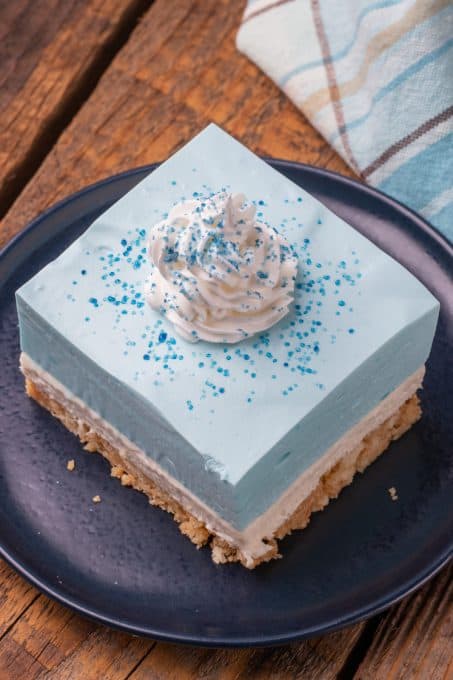
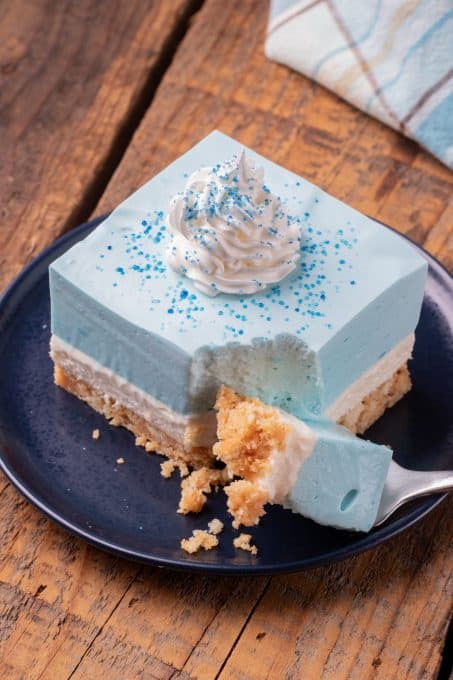
Top each bar with dollops of additional Cool Whip or whipped cream. Sprinkle blue sugar, sprinkles or other edible decorations before serving!
How do I store them?
Dream bars taste best cold straight from the refrigerator! Store any bars you won’t eat right away tightly covered in the refrigerator. Enjoy within 3 days for best taste.
Dream Bar Recipes
Once I learned how to make dream bars, there was no stopping me. It’s incredibly fun to create different flavor combinations and everyone loves them.
It’s no wonder I have more than 20 different dream bar recipes on the site, plus plenty of other variations on the no-bake cheesecake concept.
If you’re a chocolate fanatic, I have you covered. These Chocolate Peanut Butter Dream Bars and these Chocolate Turtle Dream Bars taste like, well, a dream come true.
They’re not called “dream bars” for nothing, folks.
I also adore Chocolate Mint Dream Bars and the pure decadence of Chocolate Covered Strawberry Dream Bars.
Oreos and cheesecake seem like they were made for each other. Especially when they’re combined to make Oreo Pudding Dream Bars or Cookies & Cream Cheesecake Bars. It’s woth buying a few extra packages of Oreos next time you go shopping, just for an excuse to add them to your next dessert.
Speaking of cookies: I have kind of an affinity for Circus Animal cookies. You know, those animal-shaped cookies with a pink icing coating and sprinkles? I couldn’t help but create a recipe for Circus Animal Dream Bars.
The color of those bars would make a great easy gender reveal dessert recipe too. Make a batch of the Blue Raspberry Cream Dream Bars and a batch of pink dream bars. Then everyone can take their “guess” of the gender by choosing which color bar they want!
Looking for more dream bar recipes with fruit? Along with the raspberry version, I have recipes for blueberry, cherry, strawberry, and orange creamsicle dream bars for any craving.
Raspberry Recipes
Cooking and baking with raspberries is an easy way to add color, sweetness and a zesty hint of flavor.
Today’s bars are made with raspberry JELLO and extract rather than fresh berries. For a dessert recipe with real raspberries, check out this epic Orange Spice Cake. It’s filled with a sweet combination of fresh raspberries and cranberries; perfect for the holidays!
You can turn any cake into a raspberry cake by adding a little Simple Raspberry Syrup to the frosting. It’s a quick and easy way to infuse raspberry flavor into all kinds of desserts and drinks.
And if you want raspberries for your first meal of the day instead of your last, give these easy and delicious Raspberry Cream Cheese Scones a try. Everyone who’s made them loves them.
~ FOLLOW ME on SOCIAL MEDIA ~
~ FACEBOOK ~ PINTEREST ~
~ INSTAGRAM ~ TWITTER ~
SIGN UP FOR THE WEEKLY
365 DAYS OF BAKING & MORE
NEWSLETTER BELOW!
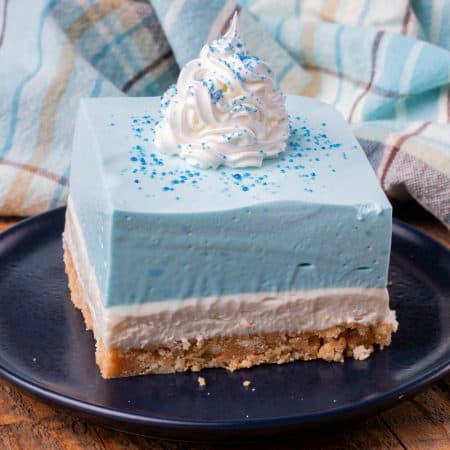
Blue Raspberry Cream Dream Bars
Equipment
- Mixer
- Mixing bowls
- parchment paper
- 8 X 8-inch cake pan
- silicone spatula
- Offset spatula
- piping bag and piping tip if desired
Ingredients
- 8 ounces Cool Whip or 1 recipe of my Stabilized Whipped Cream instructions to divide below
Nilla Wafer Crust
- 1 ½ cups Nilla Wafer Cookie Crumbs about 45 cookies
- 5 tablespoons unsalted butter
Raspberry Cream Layer
- 3 ounce package blue raspberry jello
- ¾ cup boiling water
- ¾ cup cold water
- 8 ounces cream cheese room temperature
- 1 teaspoon raspberry extract
- 8 -10 drops blue food coloring
- 2 cups Cool Whip or Stabilized Whipped Cream
Cheesecake Layer
- 8 ounces cream cheese room temperature
- 1 cup powdered sugar
- 1 teaspoon pure vanilla extract
- 1 cup Cool Whip
- additional Cool Whip, my Stabilized Whipped Cream or can whipped cream for serving if desired
- blue sugar for sprinkling if desired, pictured and directions in recipe
- blue sprinkles or edible decorations if desired
Instructions
Nilla Wafer Crust
- Line an 8 X 8-inch baking pan with parchment, so that you can easily remove the bars to evenly slice and serve.
- In a medium bowl, melt the 5 tablespoons of butter in the microwave for about 30 seconds. Stir and melt for another 5-10 seconds, if necessary.
- In a food processor, pulse the Nilla Wafers until they are fine crumbs. Add the cookie crumbs to the melted butter and mix with a rubber spatula until all is well incorporated.
- Pour into the prepared baking pan and spread, pressing down to create an even crust. Place pan into the freezer while preparing the rest of the recipe for a minimum of 30 minutes.
Blue Raspberry Gelatin
- Into a 2-cup measuring glass, mix the blue raspberry gelatin with 3/4 cup boiling water. Stir until dissolved. Add the 3/4 cup cold water and stir. Place into refrigerator until completely cooled, but not set – about 10 minutes.
Blue Raspberry Cream Layer
- In a mixing bowl, beat 8 ounces of the cream cheese with the raspberry extract and blue food coloring.
- Slowly pour in the chilled gelatin mix while mixing everything together. Once completely smooth, place into refrigerator to chill and thicken for one hour. *See Note.
Cheesecake Layer
- In a mixing bowl, beat another 8 ounces of cream cheese, the confectioners' sugar, and vanilla together until smooth and creamy. With a rubber spatula, fold in one cup of the Cool Whip.
- Place dollops of cheesecake mixture onto the frozen crust and with an offset spatula, spread to form an even layer.
Blue Raspberry Layer continued
- With a rubber spatula, fold the remaining Cool Whip (about 2 cups) into the chilled blue raspberry cream mixture, combining until evenly distributed and smooth.
- Gently pour the blue raspberry cream onto the cheesecake layer and spread evenly with an offset spatula.
- Place into the refrigerator overnight or for a minimum of 6 hours. I've found that overnight is best.
- When slicing, remove the bars from the entire pan by lifting them out in the parchment. Run a large knife under hot water, dry off, and then slice through the bars, repeating with each cut, if desired. This will allow for clean cuts.
- Serve with dollops of additional Cool Whip of my Stabilized Whipped Cream and top with blue sugar or sprinkles.
Blue Sugar
- In a small bowl, place 2 tablespoons granulated sugar. Add 2 drops of blue food coloring and mix thoroughly. Pour sugar onto a folded paper towel and set aside to dry. Sprinkle over the bars before serving, if desired
Comments & Reviews
Hello Lynne, did you mean to write .3oz for the box of jello?
No, Cory, I’ve double checked and the Jello boxes that I use to make both of the Raspberry Dream Bars are 3 ounces.
Were you questioning if the 3 ounces was too much? Because I know Jello makes 6 ounce boxes as well which would be good to use if you were doubling the recipe.
These look so cool and delicious! Is the raspberry layer thick or stable enough for piping?
Thank you, Tawnya. It isn’t the way made it, but I’m wondering if it may be if a packet of unflavored gelatin were to be added to it. I haven’t tried doing it and just made the recipe as is, so I can’t give you a definite yes unfortunately. I am intrigued, so if you give it a try, I’d love to hear what you thought, so please let me know!
Hi Lynne! I was able to pipe the blue raspberry topping onto red velvet cheesecake muffins that I made for a 4th of July party! I followed your directions then poured it into a piping bag. I let the piping bag sit in the fridge for an hour then piped it onto the muffins. I was pleasantly surprised that it piped beautifully! I took pics for you but there doesn’t seem to be a way to share it in the comments. Thank you for your recipe!