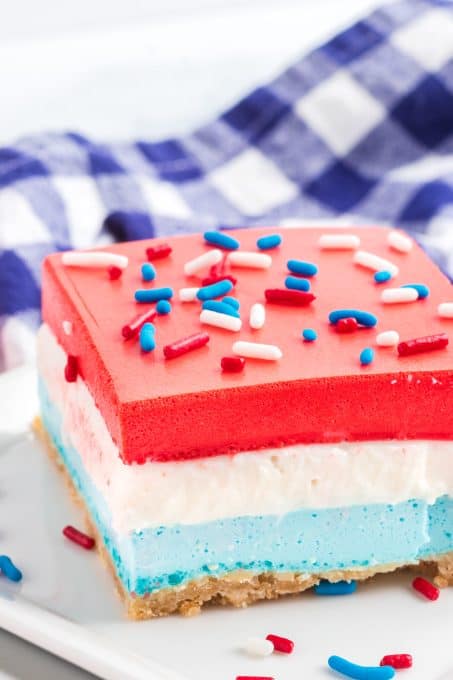
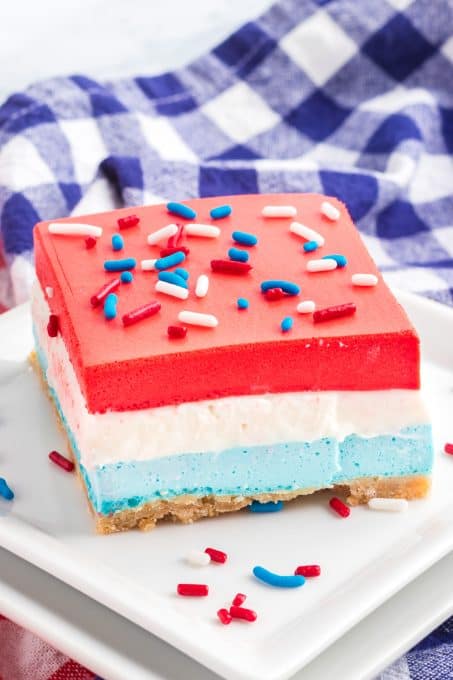
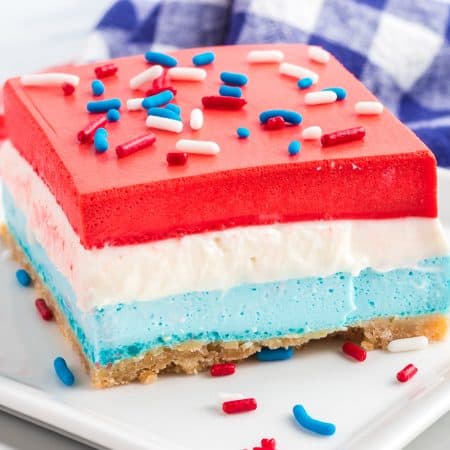
These no bake Red, White, and Blue Dream Bars are not only patriotic but also incredibly creamy, cold, and refreshing! With an easy cookie crust, creamy cheesecake filling, and blue raspberry and cherry cream gelatin layers, they’re a crowd-pleaser that will have your guests begging for the recipe!
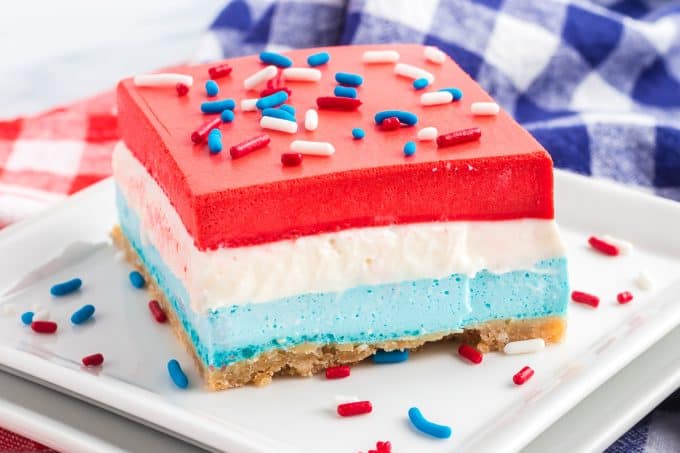
Don’t worry—though there are a lot of steps and more than a handful of ingredients, making these smooth, dreamy bars is easier than you think. I’ll show you exactly how to make perfectly layered Red, White, and Blue Dream Bars step-by-step. So, let’s get started on creating a sweet treat that will be the highlight of your Fourth of July parties, Memorial Day picnics, or other gatherings!
SAVE THIS PATRIOTIC DREAM BAR RECIPE TO YOUR FAVORITE PINTEREST BOARD!
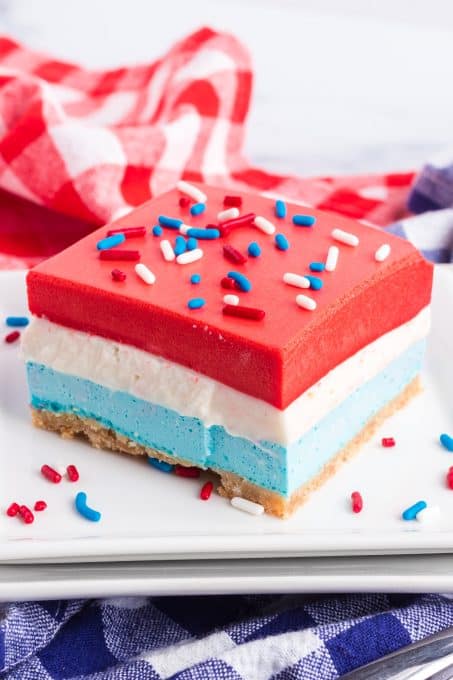
It is a perfect no-bake dessert you can make ahead of time! I’d recommend making it even the day before so that it is well-chilled and set for your gathering.
Want to add something baked to your patriotic celebration? This Firecracker Bundt Cake will definitely add some great color and fun to an already amazing dessert table.
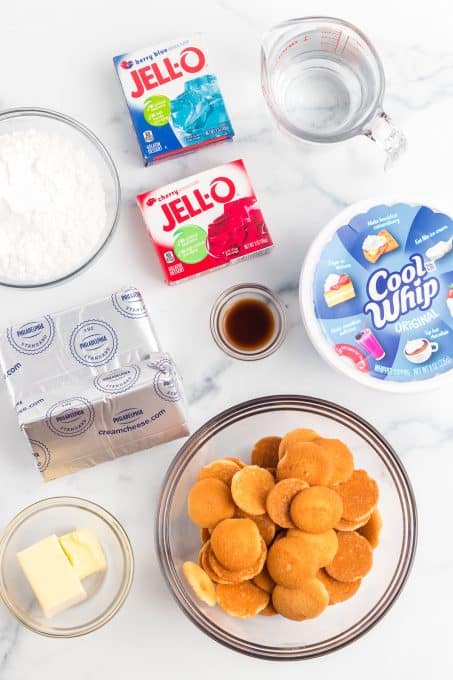
Ingredients for Red, White, and Blue Dream Bars
Before we get started, let’s make sure we have all the ingredients we need to make these delicious bars. Here’s what you’ll need:
For the Crust:
- 1 ½ cups crushed Nilla Wafers (about 45-50 cookies)
- 5 tablespoons of unsalted butter
Blue Raspberry Cream Layer
- 3 ounces blue raspberry JELL-O
- ½ cup boiling water
- ½ cup cold water
- 4 ounces of cream cheese, room temperature
- 10-12 drops of blue food coloring
- 1 cup of Cool Whip or Stabilized Whipped Cream
Cheesecake Layer
- 8 ounces of cream cheese, room temperature
- 1 cup of powdered sugar
- 1 teaspoon pure vanilla extract
- 1 cup of Cool Whip
Cherry Cream Layer
- 3 ounces of cherry JELL-O
- ½ cup of boiling water
- ½ cup of cold water
- 4 ounces of cream cheese, room temperature
- 2 teaspoons red food coloring
Preparing the Crust
The first step to making these Patriotic Jello Cream Bars is to prepare the crust.
- Line an 8 X 8-inch baking pan with parchment, so that you can easily remove the bars to evenly slice and serve.
- In a medium bowl, melt the 5 tablespoons of butter in a microwave for about 30 seconds or completely melted. Use a food processor or blender to pulse the Nilla Wafers until they are fine crumbs.
Stir the cookie crumbs into the melted butter with a rubber spatula well incorporated. - Next, pour the crumb mixture into the prepared baking pan and press the crumb mixture down to create an even crust. You’ll want to freeze the crust while preparing the next layer for a minimum of 30 minutes.
Adding the Blue Jello Layer
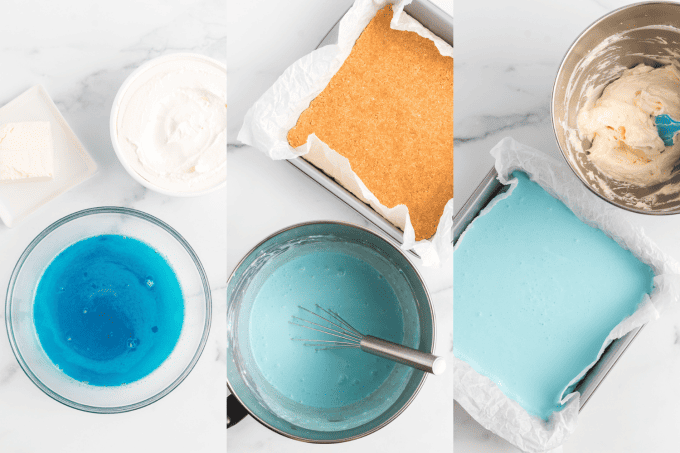
The next step in Red, White, and Blue Dream Bars is making the blue raspberry cream layer.
Note: The Blue and Red layers are made exactly the same way, though it’s important to make them separately when called for in the recipe.
- The first step is making the gelatin. Use a 2-cup measuring glass to mix the blue raspberry gelatin with ½ cup of boiling water. Stir until dissolved, then add ½ cup cold water and stir again. Let it cool in the refrigerator for 8-10 minutes, but we don’t want it to set up yet.
- While the jello cools, beat 4 ounces of cream cheese in a mixing bowl until smooth. Incorporate the cooled blue gelatin slowly into the cream cheese with either an electric mixer or a whisk (though I have had much better results doing it by hand with a whisk!) Add 1 cup of Cool Whip (or try my Stabilized Whipped Cream!) and blue food coloring, then mix until fully incorporated.
- Once it is completely smooth and even in color, pour the blue cream jello over the frozen crust. Refrigerate for at least an hour.
Cheesecake Layer (White Layer)
Next, it’s time to make the creamy cheesecake layer. In a large bowl, beat the softened cream cheese, powdered sugar, and vanilla together until it’s smooth and creamy. Fold in 1 cup of Cool Whip with a rubber spatula.
Place many small dollops of the cream cheese mixture on top of the blue jello layer, then spread evenly with an offset spatula. This helps keep the cream cheese from digging into the blue layer as you spread. Place it back in the refrigerator while you prepare the cherry gelatin layer.
Add the Cherry Jello Layer
They wouldn’t be Red, White, and Blue Jello bars without the red Jello layer!
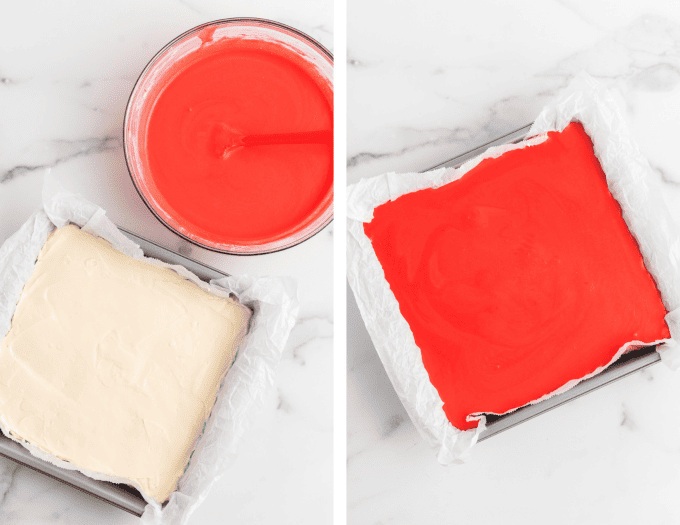
Follow the same process you used for the blue raspberry layer. Make the gelatin first, then when it’s cool, combine it with softened cream cheese, Cool Whip, and red food coloring as directed until you have a beautiful red layer! Pour it over the cheesecake layer and spread evenly with the offset spatula.
At this point, the bars need to be refrigerated for 8 hours or even overnight!
Decorate and Serve Red, White, and Blue Dream Bars
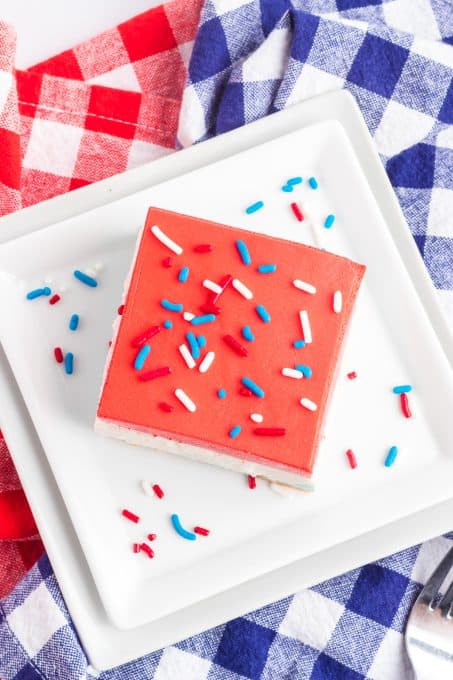
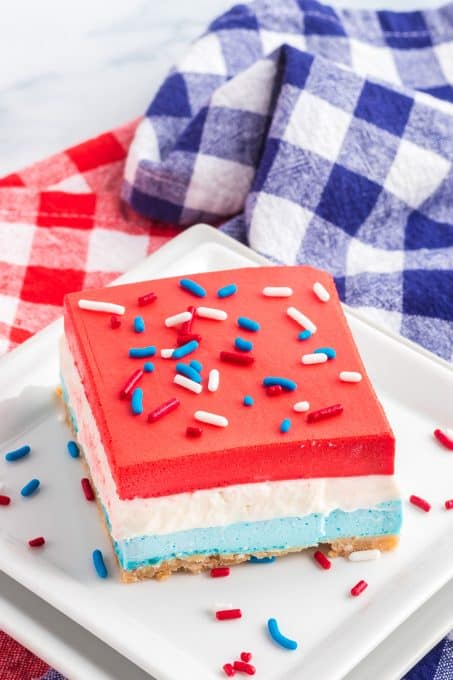
Now that all the layers are complete, it’s time to serve the dream bars. Start by removing the bars from the pan by lifting the parchment paper out completely. Run a knife under warm not hot water, then dry it off and use it to slice through the red, white, and blue bars.
Make sure to wipe the knife clean between each cut and even run it under warm water each time. Once the bars are cut, carefully remove them from the parchment paper and place them on a serving platter. Top with patriotic sprinkles and serve!
Recipe Notes:
- Use the amounts of water in this recipe required to mix the gelatins. DO NOT use the amounts listed on the boxes. It is less than the manufacturer requires, but we want more stable gelatin and less of it.
- Also, know that if either gelatin mixture is left in the refrigerator for more than 10 minutes, the gelatin will harden and form, making it difficult to create creamy and smooth layers.
- You can definitely double this recipe and use a 9 x 13-inch baking dish; just double the amounts of the ingredients and follow the same instructions.
- More fun topping ideas: fresh blueberries, tangy raspberries, white chocolate chips
Storing Red, White, and Blue Dream Bars
This red, white, and blue dessert can be stored in an airtight container in the refrigerator for up to 3 days.
Now that you know how to make these delicious Red, White, and Blue Dream Bars, it’s time to get baking. I hope you enjoy making and sharing these dreamy bars with your loved ones this summer. Happy baking!
My Favorite Dream Bar Recipes
I’m kind of known for my dream bars, so check out some of these great desserts next time:
- Orange Creamsicle Dream Bars
- Chocolate Peanut Butter Dream Bars
- Strawberry Cheesecake Dream Bars
- Oreo Pudding Dream Bars
- Red Velvet Cherry Dream Bars
Red, White, and Blue Dream Bars
Equipment
- Mixer
- Mixing bowls
- parchment paper
- 8 X 8-inch cake pan
Ingredients
- 8 ounces Cool Whip or 1 recipe of my Stabilized Whipped Cream divided. You'll need one cup for each layer.
Nilla Wafer Crust
- 1 ½ cups Nilla Wafer Cookie Crumbs about 45-50 cookies
- 5 tablespoons unsalted butter
Blue Raspberry Cream Layer
- 3 ounces blue raspberry jello
- ½ cup boiling water
- ½ cup cold water
- 4 ounces cream cheese room temperature
- 10-12 drops blue food coloring
- 1 cup Cool Whip
Cheesecake Layer
- 8 ounces cream cheese room temperature
- 1 cup powdered sugar
- 1 teaspoon pure vanilla extract
- 1 cup Cool Whip
Cherry Cream Layer
- 3 ounces cherry jello can use raspberry if you want to keep that flavor profile, but you'll most likely need a bit more red food coloring.
- ½ cup boiling water
- ½ cup cold water
- 4 ounces cream cheese room temperature
- 2 teaspoons red food coloring
- 1 cup Cool Whip
Instructions
Nilla Wafer Crust
- Line an 8 X 8-inch baking pan with parchment, so that you can easily remove the bars to evenly slice and serve.
- In a medium bowl, melt the 5 tablespoons of butter in a microwave for about 30 seconds. Stir and melt for another 5-10 seconds, if necessary.
- In a food processor, pulse the Nilla Wafers until they are fine crumbs. Add the cookie crumbs to the melted butter and mix with a rubber spatula well incorporated.
- Pour into the prepared baking pan and spread, pressing down to create an even crust. Place pan into the freezer while preparing the next layer for a minimum of 30 minutes.
Blue Raspberry Gelatin
- Into a 2-cup measuring glass, mix the blue raspberry gelatin with ½ cup boiling water. Stir until dissolved. Add the ½ cup cold water and stir. Place into refrigerator until completely cooled, but not set – about 8-10 minutes.
Blue Raspberry Cream Layer
- In a mixing bowl, beat or whisk the 4 ounces of the cream cheese until smooth.
- Mix the gelatin again, and very slowly pour it into the cream cheese while mixing everything together. I have used both an electric mixer and a whisk to incorporate the gelatin into the cream cheese and had better results and less cream cheese clumps using some good ol' elbow grease and a whisk.
- Mix in one cup of the Cool Whip or Stabilized Whipped Cream and blue food coloring until well incorporated. You can always add more food coloring if you'd like it a darker hue. Once completely smooth and an even color, pour over the frozen crust. Refrigerate to chill and thicken for a minimum of one hour.
Cheesecake Layer
- In a mixing bowl, beat 8 ounces of cream cheese, the 1 cup confectioners' sugar, and 1 teaspoon vanilla together until smooth and creamy. With a rubber spatula, fold in one cup of the Cool Whip.
- Place many small dollops of the cheesecake mixture onto the blue raspberry layer and with an offset spatula, spread evenly. I say many small dollops as opposed to one big one or bigger ones so that as you spread, the cream cheese doesn't dig into the blue gelatin. Place into refrigerator while preparing the red cherry layer.
Red Cherry Gelatin
- Into a 2-cup measuring glass, mix the cherry gelatin with ½ cup boiling water. Stir until dissolved. Add the ½ cup cold water and stir. Place into refrigerator until completely cooled, but not set – about 8-10 minutes.
Red Cherry Cream Layer
- In a mixing bowl, beat or whisk the 4 ounces of the cream cheese until smooth.
- Upon removing the gelatin from the fridge, mix well, and again, using your electric mixer or a whisk, very slowly pour it into the cream cheese while mixing everything together.
- Mix in one cup of the Cool Whip or Stabilized Whipped Cream and 2 teaspoons of red food coloring until well incorporated. Gently pour the cherry cream onto the cheesecake layer and spread evenly with an offset spatula. Place into the refrigerator overnight or for a minimum of 8 hours.
- When slicing, remove the bars from the entire pan by lifting them out in the parchment. Run a large knife under warm but not hot water as it will start to melt the gelatin. Dry it off, and then slice through the bars, repeating with each cut. This will help make clean cuts. Serve topped with red, white, and blue sprinkles and additional whipped cream, if desired.
Comments & Reviews
The kids will love this. Was thinking of doing it for just 4th of July, but I wanted to make cheesecake. If I do, this will be perfect to just change a few colors for a baby shower theme!
Thank you, and I hope you enjoy them!
I also have these Red Raspberry and Blue Raspberry Dream Bars that are also perfect for baby showers.