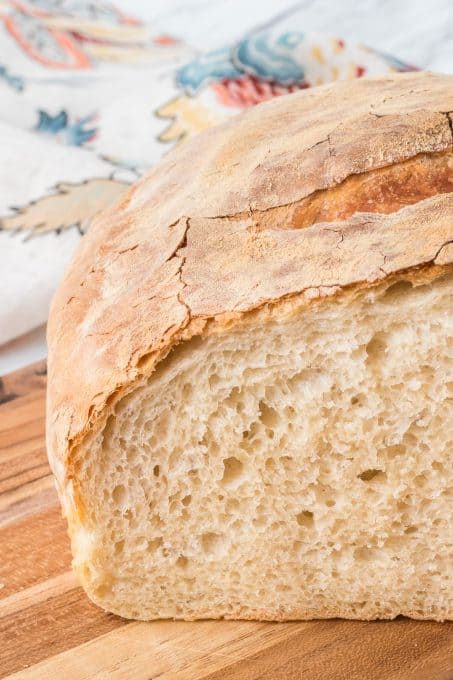
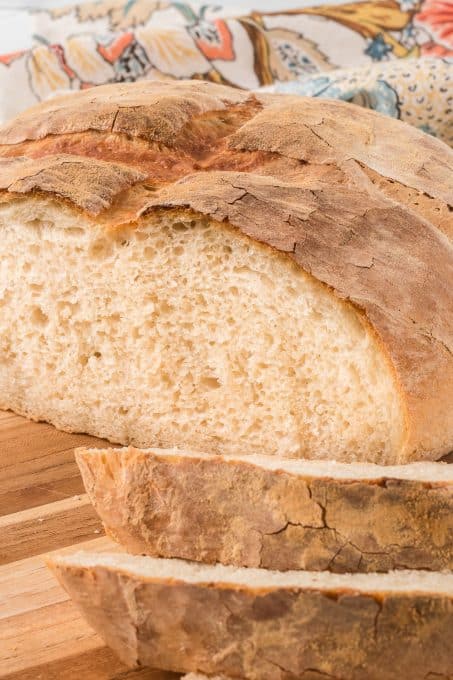
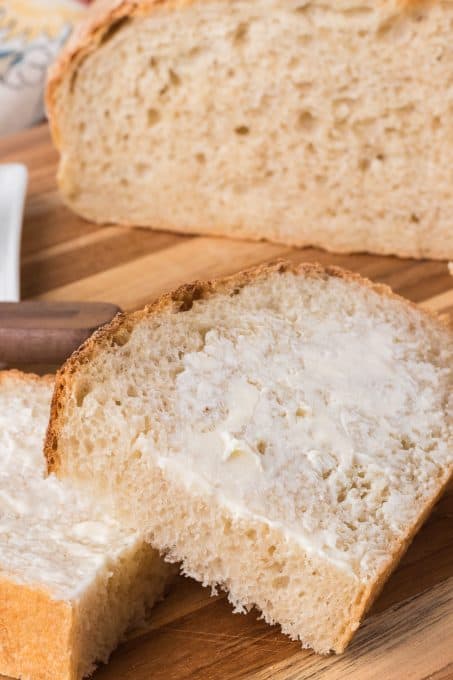
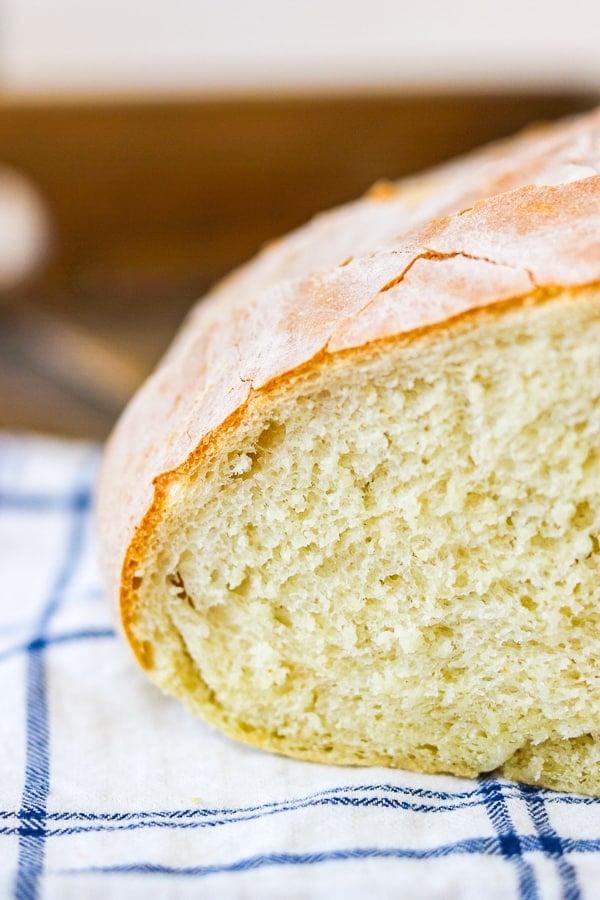
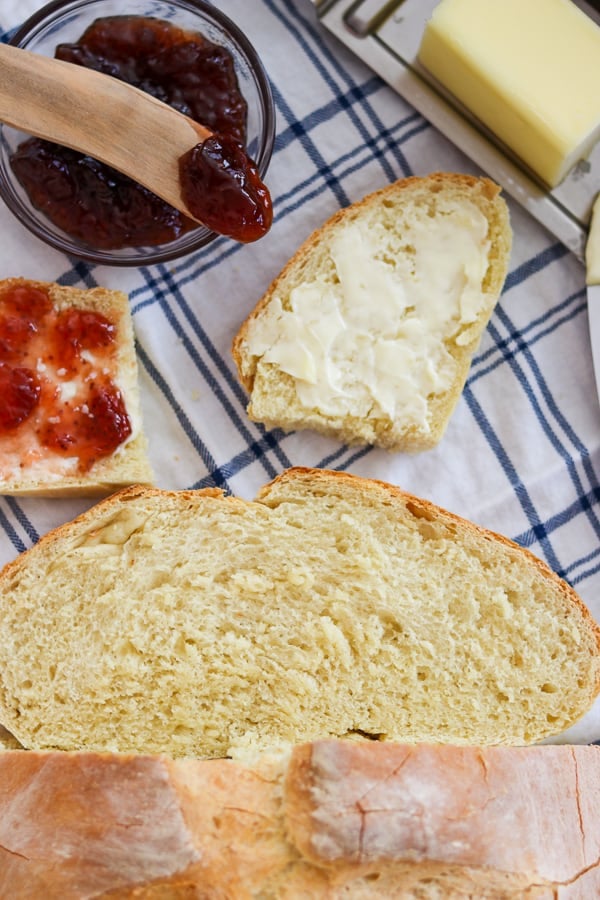
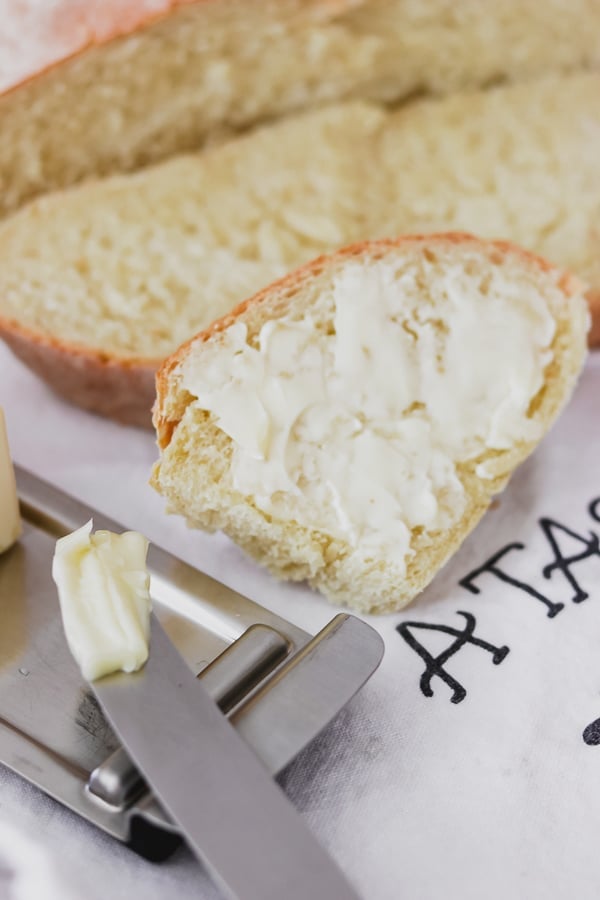
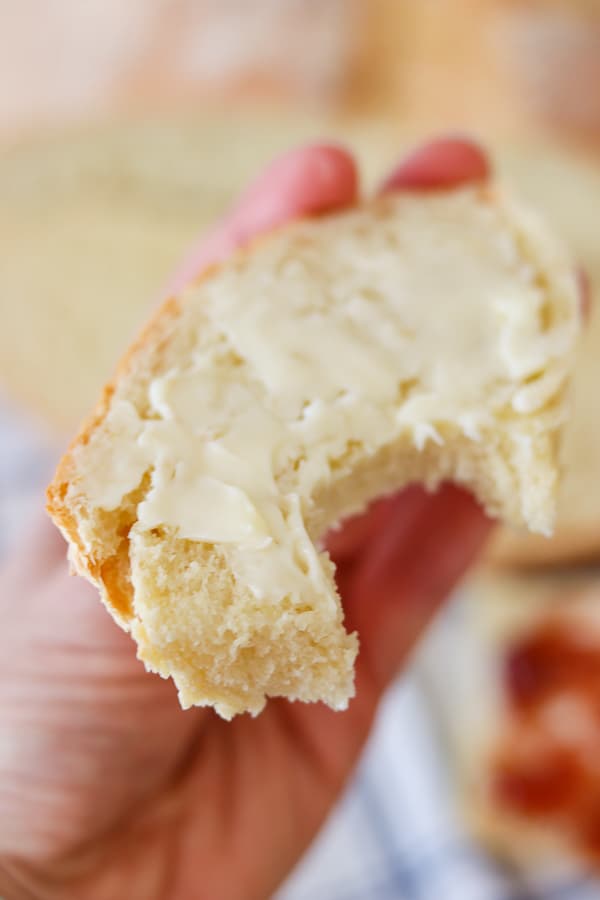
My Grandma’s Italian Bread has the perfect crunchy, chewy crust and is so incredibly soft and delightful on the inside. This homemade bread is great out of the oven slathered with butter, as a side with your favorite pasta dinner, used for your panini sandwich at lunch, or even toasted for breakfast!
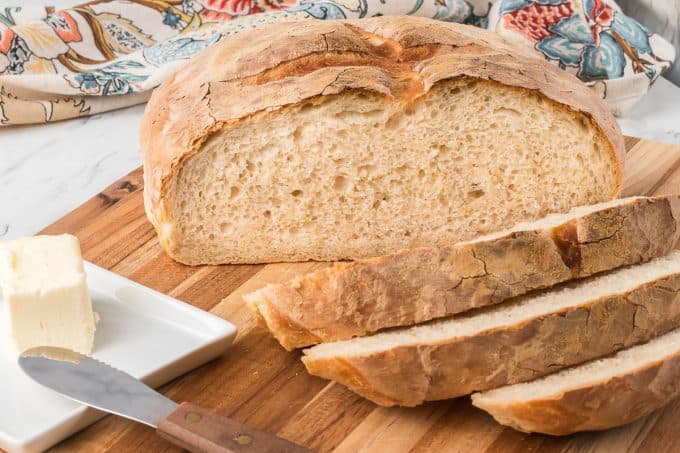
I grew up eating this bread at my grandparent’s house growing up so often that I honestly don’t remember a time when she didn’t have a loaf in her kitchen.
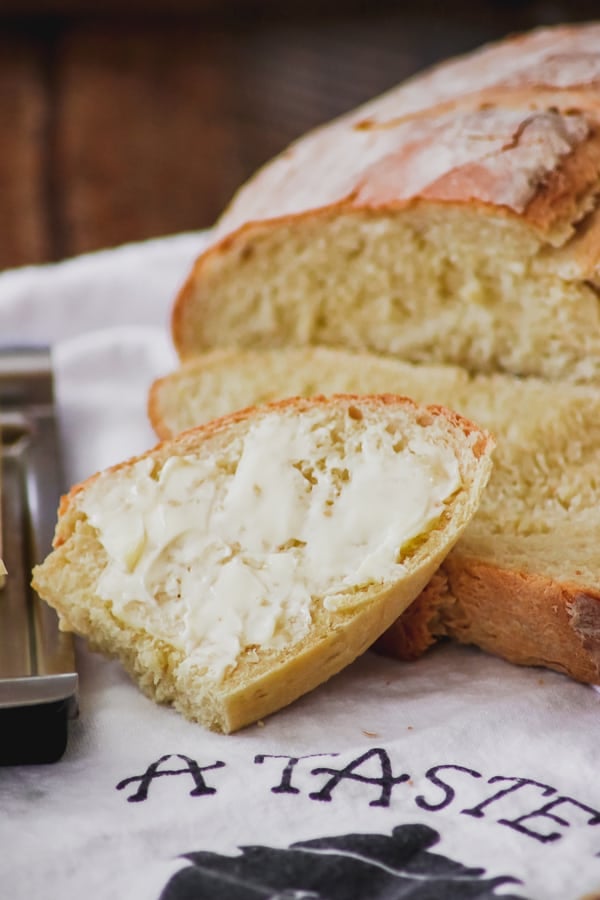
She made two loaves every other week, and would freeze the second so we could have it the following week. We ate it with her Chicken Cacciatore (Kitchen Chakkatore was what I called it when I was little), Manhattan Clam Chowder, and with just about every dinner. However, my favorite way of eating it was right out of the oven completely smothered in butter!
SAVE MY GRANDMA’S ITALIAN BREAD RECIPE TO YOUR FAVORITE PINTEREST BOARD!
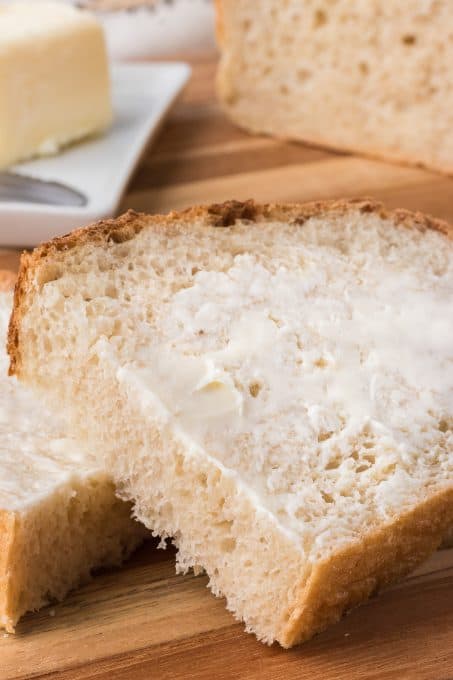
What is Italian Bread?
Though bread is an important part of Italian cuisine, it’s important to note that there are many different varieties of Italian bread. As a general rule, traditional Italian bread is usually made with simple ingredients and tends toward savory flavors. You bake it in a very hot oven on a flat stone to create that perfect, crusty loaf.
Ingredients for Rustic Italian Bread
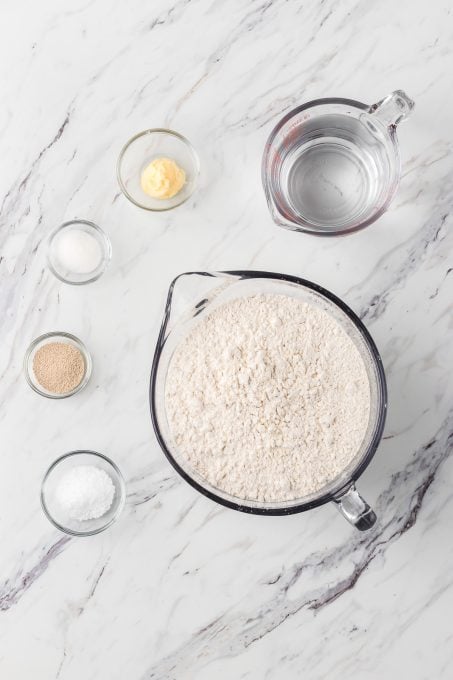
This delicious recipe makes two loaves of bread. Here’s what you’ll need to make your own bread:
- 2 ¼ teaspoons of dry instant yeast (or 1 packet)
- 3 ½ cups warm water
- 8 cups all-purpose flour, divided
- 1 tablespoon shortening
- 3 teaspoons salt
- 1 teaspoon granulated sugar
- 1 cup of hot water for baking
Equipment Needed
Besides the usual baking supplies, you’ll need a flat stone like a pizza stone and a broiler pan for steaming your bread. While you can substitute an inverted cookie sheet for the pizza stone, you really need the broiler pan or a similar metal pan (NOT glass!) as it goes in a very hot oven!
How to Make Italian Bread
Bread made with yeast requires a lot of time, so make sure you plan ahead. There are two rise times, plus the time you need for mixing and baking. It may seem like a long time, but the process goes quickly and is most definitely worth the wait!
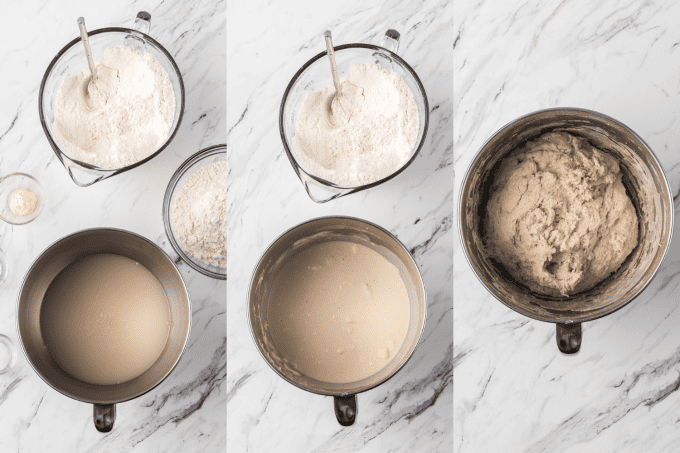
- First, place the active dry yeast in a large mixing bowl (or the bowl of a stand mixer) and pour the warm water over the yeast to dissolve. Let it sit for about 5 minutes to activate. Then add 3 cups of white flour, the shortening, salt, and sugar.
- Beat with an electric mixer for 2 minutes, then add the rest of the flour, beating until all the flour is incorporated and a sticky ball of dough forms.
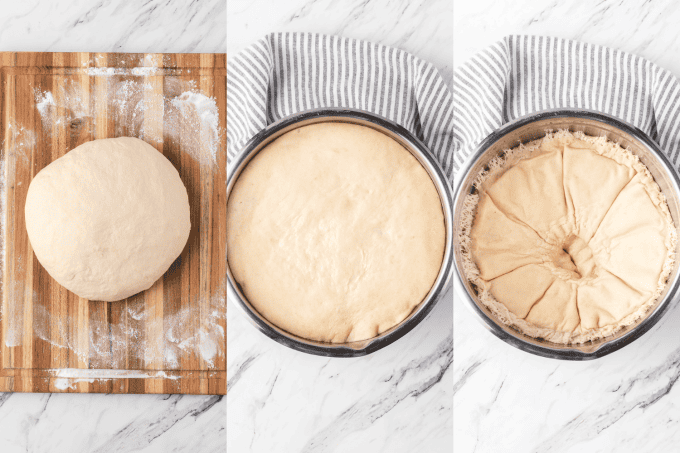
- Turn the bread dough out onto a lightly floured surface, dusting the top with flour to prevent sticking. Knead for about 7 minutes, adding flour as necessary to prevent sticking. Don’t go crazy with the flour here; just use a teaspoon at a time.
- Note: I often use the dough hook attachment on my mixer to knead the dough instead of doing it by hand.
- Let the dough rest for 5 minutes, then transfer it to a well-greased bowl. Turn the dough once to coat, then cover it lightly with a kitchen towel and let it rise for at least two hours.
- Now, punch the dough down and divide it in half. Flour your hands and the surface as necessary, then form each half into a short, thick loaf and place them each on a sheet of parchment paper. Let both loaves rest for 40 minutes.
Baking the Italian Bread Loaves
- Place a pizza stone or inverted baking sheet in the oven on the middle rack. Place the broiler pan or other metal pan on the lower rack. You’ll need this to hold the water for steaming when you bake the bread.
- Heat the oven to 450 degrees F. If you’re using a baking stone, let it sit in the oven for 20 minutes before placing the loaves on top. If you have a metal baking sheet, it only needs to be in the oven for 10 minutes before you bake the bread.
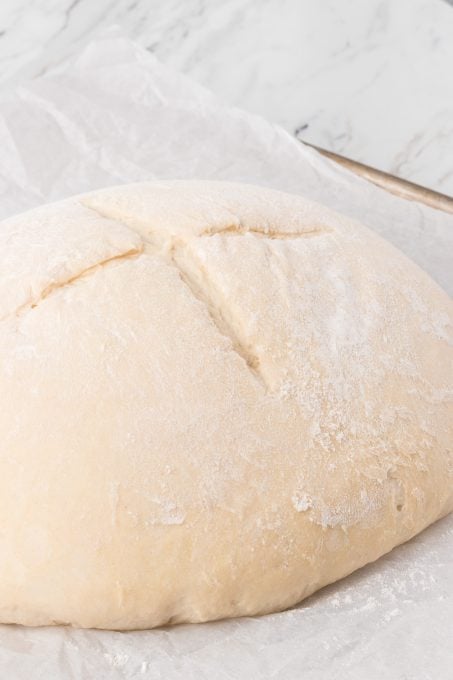
- Lightly dust the tops of the loaves with flour, then use a sharp knife to score an X into the top.
- Place the parchment paper with a loaf of dough onto the baking stone in the oven. Pour one cup of water into the broiler pan, then quickly shut the oven door to contain the steam.
- Bake for 24-28 minutes until the bread is golden brown. You can tell it’s done by tapping on the bottom; it should sound hollow.
- Remove it from the oven, then repeat the process with the second loaf. Let the loaves cool before slicing for best results.
Tips for making Grandma’s Italian Bread Recipe
- Be patient! This recipe is super easy to make, but there are times when the dough must both rest and rise. It can be a struggle, but it’s well worth the wait, believe me!
- Divide the 3 cups of flour into a separate bowl. That way, you won’t have to take the time to re-measure when you’re adding it to the yeast mixture.
- When I can’t find a warm enough spot in my house for the dough to rise, I turn my oven to bake at 170° while I mix and knead the dough, then turn it off. Then I put the dough in the warm oven. Warm (but not hot) temperatures help the dough rise.
- I’ve had success both baking it on the pizza stone, as well as on a cookie sheet upside down. Both work well, but I just prefer the way it turns out on the cookie sheet best.
- Listen for that hollow sound when you tap on the bottom to know that the loaves are completely baked. This is key. There have been many times that I’ve been impatient to bite into a slice that I’ve taken it out too early. The middle needs to be completely done and the hollow sound helps you identify its doneness without busting into the loaf.
How to Store Leftover Bread
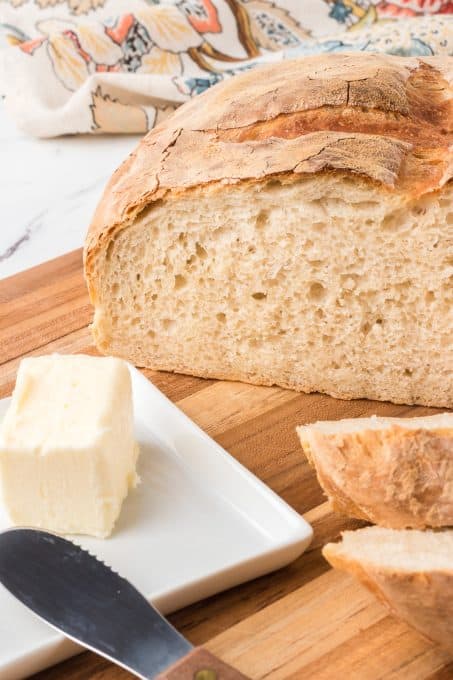
Your bread loaves should be wrapped and stored at room temperature. You can wrap it in aluminum foil or keep it in an airtight container. When properly stored, this bread should last for 2-3 days.
Can you freeze Italian Bread?
If you don’t devour both loaves in the first week (like I often do), you can freeze the second loaf. Wrap it up tightly in plastic wrap once it cools, and then again in aluminum foil. Then freeze for no more than three weeks.
What goes well with this bread?
There’s just something about making a loaf of homemade bread – the kneading, the baking. I just find it so comforting, don’t you?
- Bread can turn any dish into a full meal. It’s so good alone or with a dipping oil like this Restaurant-Style Olive Oil and Balsamic Dipping Oil.
- Put this loaf of bread on the table as a side for One-Pot Sausage Linguini or spaghetti with Mozzarella Stuffed Meatballs.
- Slices of homemade bread are excellent with Pepperoni Pizza Pasta and Chicken Mozzarella Pasta, too. Try it with my extremely popular Stuffed Shells, these Cottage Cheese Stuffed Shells, Chicken Piccata, or any Italian food!
- It is perfect for dipping into sauces and soups, too! We love eating it when I make this Homemade Chicken Noodle Soup.
My Favorite Bread Recipes
Next time you want to make some bread, try one of these delicious recipes:
FOLLOW ME
FACEBOOK ~ PINTEREST
INSTAGRAM ~ TWITTER
YOUTUBE
Keep an eye out for more of my easy recipes each week!
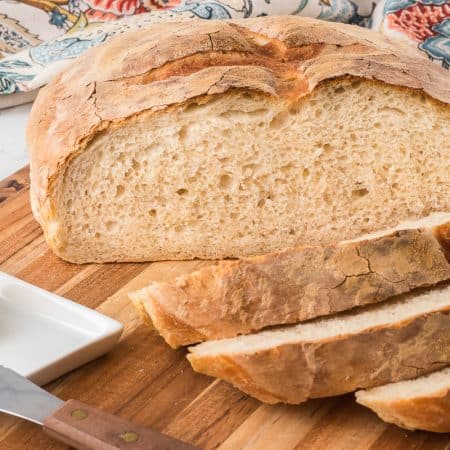
Grandma’s Italian Bread
Ingredients
- 2 ¼ teaspoons dry yeast
- 3 ½ cups warm water
- 8 cups all-purpose flour divided
- 1 tablespoon shortening
- 3 teaspoons salt
- 1 teaspoon sugar
- 1 cup of hot water for baking
Instructions
- In a large bowl, dissolve yeast in the 3 1/2 cups warm water.
- Add 3 cups flour and the shortening, salt and sugar.
- Beat with an electric mixer for 2 minutes, then add the rest of the flour, beating until all flour is incorporated and a sticky dough ball is formed.
- Turn out onto a floured surface, putting a little bit more flour on the top to prevent sticking.
- Knead for about 7 minutes, adding as little flour as possible, but enough to prevent it from sticking.
- Allow the dough to rest for 5 minutes before transferring to a well-greased bowl.
- Turn the dough over in the bowl once to get it coated.
- Cover lightly with a clean kitchen towel and let rise for at least two hours.
- Punch dough down.
- Divide dough in half.
- On a lightly floured surface and with floured hands, gently form it into a ball and place on a sheet of parchment. Do the same with the second half.
- Let both loaves rest for 40 minutes.
- Place a pizza stone in the oven on the middle shelf. On the lower rack, place the broiler pan or another metal pan. You will use this to hold the water during baking.
- Preheat to 450° F. If you do not have a pizza stone, you can also use a rimmed baking sheet turned upside down. Allow the stone to sit in the oven for 20 minutes at 450° F before placing the dough on top of it. If using a baking sheet, only place it into the oven for 10 minutes prior to baking, not the 20 as with the pizza stone.
- Lightly dust the top of the first loaf with flour and then, with a sharp knife, score an X into the top.
- Place the dough with the parchment onto the pizza stone or upside down baking sheet in the oven.
- Pour the one cup of water into the broiler pan. Quickly shut the oven door to contain the steam.
- Bake for 24 – 28 minutes, until golden brown.
- Do the same with the second loaf.
- The loaves can be tested for doneness by tapping on the bottom. They should sound hollow.
Notes
Instead of using the dry yeast from a jar, you can also use 1 package of dry yeast which will yield you the amount needed.
For rising, I usually turn my oven to the lowest temperature and then turn it off before I place the dough into the oven to rise.
Nutrition

Comments & Reviews
The bread looks wonderful. I could eat this as my only sustenance. Pinned.
Annamaria
Thank you so much Annamaria! It was delicious.
Thanks for the pin!
I’m making this bread now and it will brown on the bottom. Any suggestions
Another bread recipe I found used ice cubes instead of water in the broiler pan.
Good tip, Susan. I’ll have to try that next time. Thanks!
Almost a decade since you published this recipe. Its so good/reliable/flexible. I typically use beef lard (tasteless for those of you who haven’t tried it) bc thats what I have on hand. The bread has great chew, nice crust and good shelf life with the lard. Thanks to you and your beloved grandmother.
I am trying this in my Bosch hoping for the best. Have you ever used fresh ground wheat berries? I’d like to try that since I have plenty on hand. Looks yummy!
No, I haven’t Denice, but it sounds good! Let me know how it is if you try it with the wheat berries!
Can you do this in a bread machine? I am unable to knead dough due to a disability. I usually just use the dough setting.
Hi Judy!
You could try the bread machine. I honestly cannot tell you if it would or wouldn’t work as I’ve never used one before. I don’t see why it shouldn’t though. Please give it a try and let me know how it goes and I’ll add it to the recipe!
I have always wanted to bake my own bread but never had time while I was working, but now that I am retired I have had time to get into making it… Fortunately I have a big kitchen aid stand mixer and it makes excellent bread dough turns out perfect every time… as everyone here knowsit is trial and error when you are learning how to make bread… I have only been baking bread for 4 months but I have picked up 2 tricks that really help… at first m loaves were coming out very dense and did not rise as much as I wanted… so my two solutions were to order a 12 inch silicone bread pan from Amazon and I add one tablespoon of vital wheat gluten for every two cups of flour… I allow it to rise about 2 inches above the top of the pan and the added benefit to using the silicone pan I hope your story is that it is flexible to a certain extent and as the dough Rises it pushes out on the sides allowing the bread to be almost round in shape… And nothing sticks to the silicone and the bread pops right out… I also got silicone mats to use on the counter when working and shaping the dough and nothing sticks to it… I hope that this will help some beginners like me
Jim, first of all congratulations for tackling bread making! It’s definitely not an easy task and I applaud you for your determination. Those rewards are pretty awesome though, aren’t they? Nothing like the smell of bread baking or having a slice when it’s fresh out of the oven.
Thank you so much for sharing all of your tips. I’m sure they’ll be a great help and encouragement to those who haven’t tried or are just starting out as a bread baker.
Enjoy!
I have a small machine and cut the recipe in half and made the dough in the machine only. And It’s in the oven now. It looks like it will be ok.
Lisa, I hoped it worked well for you!
When you say ‘shortening’, is that Crisco? Or butter? Really want to try baking my own bread and this looks wonderful!
Becky, yes it is Crisco.
Thanks for asking!
Crisco has soy products in it, just fyi. I used good old lard and it worked perfectly.
(My grandson is allergic to soy only reason I ever looked)
Kerri, good point, thank you for making people aware if they do have an allergy.
Yes, my grandmother used lard in the recipe more often than she used Crisco, so you can definitely use either.
How much is in 1 package of dry yeast? (Either weight or teaspoons/tablespoons)
Sylvia, I don’t know about weight, but the package measurement comes to 2 1/4 teaspoons.
Thanks Lynne!
Actually it is 2 1/4 tsp.
That’s what the Fleischman pack says too.
This is hands down the best bread recipe I have ever tried! Thank you so much! It was delicious! I’m eating the bread as I type! 🙂
Oh, Nicole, that is SO awesome to hear!!! You really made my day, girl!!
Thank you!! I am so glad you enjoyed it.
You’re welcome! But I should be thanking you for sharing such a wonderful recipe! 🙂 I should mention I did the whole recipe by hand because I didn’t have a large mixer and the bread was still wonderful! 🙂
Do you think I could substitute butter for the shortening – I don’t really like using crisco. Thanks!
MaryPat, I haven’t used butter in the recipe, and from what I understand when reading differences between butter and Crisco, it will yield a different result. Unfortunately, I couldn’t tell you what that would be.
If you do make it with the butter, please let me know how it turns out – I’m interested in the result.
I used butter in this recipe today. It was delicious.
Crisco is not a good product to use. It is made with petroleum. Instead use what our great grandmothers used LARD. Found in Crisco isle in a box like container.
Hi, Lynne! I can hardly wait to try your bread recipe. My question before I start – Do you bake one loaf at a time? It seems to be the direction, however curious that the 2nd loaf bakes up nicely too after sitting out while the first loaf bakes. …. Or am I reading the directions incorrectly …? I appreciate your expert clafification. 🙂
And… awesome photos! My mouth is now craving the taste and texture of butter slathered freshly baked bread. 🙂
Chey,
I do only bake one loaf at a time. My grandmother always did both, but I had trouble fitting them into the oven at the same time. The one loaf sat on parchment on the counter while the other was in the oven. It turned out absolutely fine, and baked just as nicely as the first.
Now I’m craving it! haha
Let me know how you enjoy them and thanks so much for your comment!
Hello
Can you freeze this bread?
Christina,
I have not frozen it, but if I remember correctly my grandmother used to freeze it. It was only her and my grandfather, so two loaves were too much to eat, so she would wrap it in tin foil and place it in plastic bags.
Thanks Lynn
Mine is baking right now!!!
Enjoy it! Wish I was there to smell it baking!
Made this weekend and was the best bread recipe I have ever used. YUMMY!!
Oh, Dawn, thank you so much for letting me know that. I know you have made my grandmother proud!! 🙂
Hi Lynne!
2 questions…
1. Do I let the yeast bubble and fully rise before adding the other ingredients?
2. If I’m using a KitchenAid, should I use the paddle attachment or dough hook?
Thank you for sharing this recipe. I’ll be making it as soon as I read your response!!
A bit delayed in my response! So sorry, Lynette!
I haven’t found that I need to let it bubble and fully rise before add thing the flour, etc.
I start out using the paddle attachment and then move to the dough hook. I just find it mixes better with the paddle in the beginning, but it’s really a matter of personal preference.
Yumminess!! Made this today-used margarine instead of crisco (didn’t have). Also baked both loaves at once in my convection oven. Turned out wonderfully. However the parchment paper stuck to the bottom of the loaves? Should I have greased it a bit? Only bad thing was – no bottom crust because they peeled off with the parchment paper. Made these two (quite large) loaves today, about 5 hours ago. Only 1/2 loaf left. Definitely a hit with the family!
Wow, sounds like they loved the bread, Kristine! That would make my grandmother so happy!!
Sorry about the parchment. Yes, I think greasing it beforehand would be your best best. Enjoy the next loves!
ABSOLUTELY THE BEST! This is bakery quality! I used a cast iron skillet to bake it in and also added ‘steam’ every five minutes for the first 15 minutes of baking using a squirt bottle to the sides of the oven walls. Thank you for sharing this recipe~I’ve searched and tried many others, this is truly the best!
Heidi, my grandmother would be THRILLED to hear you say that, THANK YOU!! It’s a recipe that I will cherish forever and I’m so happy to hear that you’ll be enjoying for a long time to come as well!
Do yo think I can make half this recipe? I don’t like frozen bread.
Lorna, I don’t think there’d be a problem cutting the recipe in half and only making the one loaf. Enjoy!
I just made half the recipe and it made 2 baguettes .
Topped with sesame seeds…
Excellent! Cut 3 slices with butter for my husband,.. after finishing the 2nd slice, he asked for 1 more slice ?… and I had mine with Molasses (like I use to with my Mom after making bread… we couldn’t wait for the bread to cool) Went through 1/2 of one already! Cut the other one in half and froze them in a ziplock freezer bag. Thanks for sharing your recipe.
Oh, Monique, I love that!! Thank you so much for letting me know!! I love how you added the sesame seeds and had it with molasses. I’ll have to try that!
Just baked two gorgeous loaves of this bread and it was FABULOUS! Texture and taste were spot on. Soft, slightly chewy, good “crumb” and just plain ol’ delicious!!
Thanks so much for sharing this recipe. I’ll be making it weekly from now on!
Oh, Chris, that is SO good to hear!! I know my Grandma is up there smiling from your comment. Thank you!!
I don’t own a pizza stone. Now what can I use?
Louise, a regular baking sheet will work just as well. I’ve been using that since my pizza stone broke into pieces. 🙁
Lynne Can you use bread flour instead of all pu
rpose
Hi Pam,
I found the easiest way to explain the difference between the two here, on Joy the Baker’s site about the difference between flours.
http://joythebaker.com/2014/05/baking-101-the-difference-between-baking-flours/
“Irene from King Arthur Flour explained it in dinner roll terms. Think about how you like your dinner rolls. Do you prefer your rolls soft and supple and tender? All-purpose flour is the way to go. If you prefer your rolls more firm, chewy, and substantial then bread flour would be your go-to bread baking flour.”
Knowing that the bread is already firm and slightly chewy with the all-purpose flour,I would stick with that. Then again, when Grandma started making this bread was there even such a thing as “bread” flour. Who knows. haha
Thanks for the reply I used the bread flour because I had it the bread came out great my family loved it next time I will use the all-purpose today I’m trying the bread sticks
That’s great to know, Pam. Thank you! Now I want to bake some bread. 😉
YES! I love everything about this recipe. I wish my grandma would have made me homemade bread. But she makes the best cookies, so I will take that! Can’t wait to try this recipe. We love homemade bread. Pinned, SU and Yummed.
I liike your ‘oven rise’ method.
Our kitchen is cold during the winter.
Had a mental flash and used my electric lap blanket. It’s just a smaller version of a bed size. great for snuggling on the couch.
Anyway, I bunched it slightly and left a bowl size hollow, protected it with a towel and set my bowl to rise there on low. Have to watch it doesn’t get too hot but worked perfectly.
Where there’s a will there’s a way if you really have a craving for fresh baked.
That’s a great idea, too, Ruth Ann! So glad it worked out for you and hope you enjoyed the bread!
I am NOT a bread maker but this is the third time i am making this bread and it has turned out EVERY time. love it… Thank You so much
Oh, Tom, you made my day and I’m sure my grandmother is beaming!! Thanks so very much for letting me know.
Now you’ve got me wanting to make some!
Thank you for this recipe, it turned out perfect, nice and chewy with a great crumb and it froze well too. I have been looking for a good Italian bread recipe and this is it. I’m 100% second generation Italian and my Mom made the best bread which I don’t think she even follows a recipe, but I always had trouble, until now. This worked up easy and quickly. I printed this out because I never want to lose it. Thanks again, I will be making this a lot.
This came out wonderful. I did not have shortening so I used some olive oil, plus I made it into rolls rather than the loaves. It tasted just like the bread that my Nana, who came from Sicily, used to make. I made the dough part in the bread machine that I was given 10 years ago and never even opened. In fact, this was the first loaf of bread I ever made in my 52 years on this planet. My car broke down and was stuck home with lots of cold cuts but no bread so I googled Italian bread and I like this one because it had the pan of water in oven like my Nana used when she made bread. The rolls were just perfect, not too hard and not too soft. I froze some and they taste great, not as good as warm and fresh out of oven but almost! I think they tasted best with just butter but they made great sandwich rolls. My co-worker had a piece with butter and he asked me what bakery did I get my rolls! He is a real guido and really knows his bread. He laughed at me when I told him and did not believe me. He said “seriously man, where did you buy these?” ….I told him how I made them and he was impressed as he’s known me for 20 years and cooking is not exactly what he, or anyone, can picture me doing. I have since made this recipe weekly over the last month and never buy my rolls from bakery anymore. Thanks!
It appears that you don’t take time to let the yeast proof. Is that correct?
I made your recipe yesterday. Let me just say the loaves didn’t last long!! I’m making another batch today. The house is smelling wonderfully bready delicious as I write this. My family absolutely loved this bread!!! I will be making/baking this often.
Thank you for sharing!
Thanks so much for this recipe!
I have made this twice during the last month & everyone has raved over it…one neighbor asked me how much I would charge him to make him 2 loaves for company he was having the next day…LOL…(unfortunately, I have other plans & will not be able to)…gave him the recipe instead.
My question is:
If I divide the dough in 4 (to make 4 individual loaves instead of 2), do you have any idea as to baking time, baking 2 loaves at a time? I would prefer 4 smaller loaves rather than the 2 larger loaves.
Excellent! The perfect blend of chewy and moist, and really easy to make. To simplify things I cut the recipe in half and baked in a Dutch oven. I heated the Dutch oven with the lid on for 30 minutes after punching down, kneading a little, and reshaping. Baked for 20 minutes covered, about 10 minutes uncovered to brown. A perfect loaf!
By far THE best Italian loaf I’ve ever made! We make primarily all of our family’s bread and rarely do I find a recipe I’m happy with on first try. This is one of those rare gems. Thank you so much for sharing.
Will make again and again exactly as written.
Oh, Kim, you made my day!! Thank you! I’m sure my grandmother is up there smiling, too! I absolutely love this recipe not only because it tastes so darn good, but because it makes two loaves so we’ll usually make it through two weeks with the recipe. I’ll freeze one of them for the following week just like grandma did.
That was my original plan, but the bread was so good the second loaf never made it to the freezer. Lol. Hungry teenagers had other plans.
I’ve been looking for an excellent Italian crusty bread and this one is perfect. I just made it and I coudln’t be happier. Thank you!
Oh, Kimberly, that’s so good to hear. Thank you!! I’m sure my grandmother is smiling, too!
Baking with yeast has always intimidated me, & I never really had time to experiment. I retired earlier this year, & bread baking was on my bucket list. I had a friend coming to dinner this evening & decided to give your Grandma’s recipe a try. It came out just wonderful! I still can’t believe I made that bread! It was definitely a hit at dinner. And I used my grandmother’s bowl (that she used for her breads) to let the bread rise. Thank you for sharing this awesome recipe!
Didn’t change a thing. Absolutely perfect. The loaves are beautiful. Next time I might make one loaf with Italian seasoning sprinkled into the dough and on the top. Make it focaccia-like. Maybe. Maybe not. Just so good just the way it is. Thanks!
Ah, Pam I’m so very glad you enjoyed them. My grandmother would be thrilled! Thanks for letting me know and I love the idea of the seasonings. I don’t know if I could do it though, I’m s stickler for keeping this particular recipe just the way it is.
Love this recipe! Today is my second time making this bread. I am using KA bread flour though and have noticed that I need quite a bit more than the 8 cups called for (like 3 whole cups more!). Am I doing something incorrectly? Just seems way too wet with the 3 1/2 cups of water to 8 cups of flour. Same thing happened the first time I made it but it turned out AWESOME!
Love this recipe so much I’ve been making bread for over a year trying to find the perfect one and this is it. Just one question. Do you cover the loaves when resting for the 40 mins before baking.
Anthony, thank you so much! I’m sure my grandmother is beaming!
I usually do cover both loaves with a clean tea towel that is light in weight, but I’ve also made the recipe where I haven’t covered them and haven’t had any issues. So you could do either.
Hmm, not sure what I did wrong but I ended up having to put an extra ~2 cups of flour in!
8 cups of flour should be 1kg, however I ended up putting in about 1.5kgs.. I used ’00’ flour, could that be it?
Lynne,
I have been baking bread for 45 years. Have had great success with everything except Crusty Italian bread until yesterday. It has been at least 15 years since I last tried to make Italian bread. I saw your Grandma’s recipe and immediately had to give it a try. I took the directions to heart and followed them to a “T”. Your decades long story said this baker was searching for the “Rest of the Story” past knead for 7 minutes for a long time. This has to work. It worked and in a big way. This bread is incredible. Thank you for this easy to make deliciousness. I finished about 9 p.m., made come dipping sauce and just had to share the other loaf, So off to the neighbors with bread and sauce. Kelly and her 3 teenagers were in heaven. Thanks to your grandma and your dedication to finding a workable ending I have a new no-fail recipe to add to my repertoire.
Bill,
I am smiling from ear to ear while reading your comment and I’m sure my grandmother is just as thrilled! It makes my heart so very happy that you enjoyed it so and then shared the second loaf with Kelly and her children. How fun! Thank you, thank you, thank you for letting me know. I have you enjoy this bread for many years to come and Im so glad you’ve had such great success with this recipe. Grandma knew what she was doing! And so much so that she didn’t need to write down the directions past the “knead for 7 minutes”! HA!
Enjoy, Bill!
Can I use coconut oil instead of shortening.
Esther, after doing a Google search, I read that you can substitute coconut oil for shortening in a 1:1 ratio. So, you can replace the amount of shortening called for in the recipe with the same amount of coconut oil. That being said, I have not ever made this Italian bread recipe without shortening, so I have no idea what or how the end result would be. If you use it, I’d be VERY interested in hearing how it turned out, so please let me know! Good luck with it!
Good to know that works too! I learn so much from you as well! Keep it up great post.
I am trying this in my Bosch hoping for the best. Have you ever used fresh ground wheat berries? I’d like to try that since I have plenty on hand. Looks yummy!
What size bowl is recommended to let the bread rise in? I’m really excited to try this as I love bread lol
Amy, I use a bowl that has a diameter of about 12 inches at the top. If you have a stand mixer, you be ok to use that bowl as well.
This recipe, I just found by chance on FB. I looked at the ingredients, and thought I would give it a try. Oh my gosh, its the best bread I have ever made. My husband loved it, and said the same thing. Its really good. I just made it into rolls though, that’s the difference. I got twelve big rolls which could be used for a sandwich or whatever. I cannot praise it enough. Thank you so much for sharing, and I also signed up for your newsletter. God bless.
Elena, thank you so much for your feedback and letting me know. I’m so thrilled that you love the bread. It means a lot, especially since this is a recipe that I really treasure.
Totally delicious. I didn’t change a thing and the bread turned out fantastic. Super simple to make.
Thanks so much for sharing this recipe!
Oh, Zuleyma, I am thrilled that you loved it so much and I’m sure my grandmother is as well! I appreciate you letting me know and wish you many happy days of bread baking in the future.
Hugs!!
Made this bread several times. Started baking during the pandemic and had to borrow yeast from my DIL. Recipe works great every time. Just the perfect bread for pasta, dipping, and breakfast! Love Love Love it. Freezes well. At the start of the pandemic I bought a Dutch oven because it seemed all the recipes I found called for one. I used it only once then found your recipe. I would however like to try and use it. I saw a previous reviewer managed to make a single loaf in one. Any suggestions on halving the recipe?
Oh, Corinne, I am so very happy to hear that you love this recipe so much! It is very near and dear to my heart, so I’m thrilled when people love it as much as I do.
You can easily cut this recipe in half as I’ve done it myself. All you need to do is cut all the ingredients in half and follow the instructions.
I’m interested to hear how it turns out in the Dutch oven. I have one myself, but haven’t tried it yet. Please let me know what you think!
Love this recipe!❤️
Thanks for this recipe! Loved the story of how you found the way to finish the recipe after soany years. It makes a very tasty bread for dipping in olive oil and balsamic vinegar!
Everyone loves this bread – said it was the best I’ve made and I have made lots of bread. WIll be making again. I will probably freeze some because it’s a lot of bread, but it does keep well. Thanks so much for persevering to remake her recipe. It’s a keeper. She was too it sounds like.
Thank you for the delicious recipe. This recipe makes two large loaves of tasty bread with a wonderful aroma and crumb. Has anyone tried to make one of the loaves into cinnamon bread?
Terri, thank you! I am so very glad you like it and I’m sure my grandmother is, too.
I have not made it into a cinnamon bread, but it does sound delicious. I’m curious as well to know if anyone has!
I have never left a recipe rating before, but i Just had to this time !This was my first time baking bread,it was simply delicious !It was so easy, i was afraid i did something wrong !!!!!! Thank you so much for sharing your Grandma:s recipe…..She would be so proud
my new go to recipe easy to make and taste fantastic.
Gary, thank you so much. This makes me so happy to hear and I’m sure my grandmother is just as happy!
Ohhhhh myyyyyy goshhh! This.Is.It the recipe I have been searching for. I started making bread 5ish months ago and I’ve been on the hunt making loaf after loaf but never achieving that soft interior and crunchy outside. This is perfection, a little more work than the rest but man oh man WORTH IT! Muchas Gracias Abuelita 💪🏼🙏🏼
Katie, you have absolutely made my day, thank you!! I totally loved reading this and am so very happy that you loved it so much. I know my grandmother is beaming, too! ❤️
Would really like to see an accurate time on this. Was looking for a quick recipe. Chose this one because it said less than hour. Completely inaccurate. Please include rise time in your recipes.
Annie, sorry about that. The recipe has been updated to include the correct times. I had included it, but forgot to hit recalculate when I added all the times, so it wasn’t included.
Thanks for letting me know!
The problem with this recipe is that it calls for far too much water. I believe the amount should be 2 1\2 cups, NOT 3 1/2 cups. I ended up having to use closer to 11 cups of flour because at 8 cups, it was still soup. This, of course throws off the quantities of the other ingredients. Also, the total time states 48 minutes, not taking into consideration the nearly 3 hrs of rising time. I am hoping this will turn out to be edible since, once I got all the flour added, there was no way to adjust the yeast and everything else.
Laurie, I’m sorry you had a problem with this recipe. I’ve made it countless times and I’ve never had a problem with any of the measurements. And based on the multiple comments from others who have made it, they believe the measurements are accurate as well.
Thank you for bringing the incorrect total time to my attention. I had included the rising and resting in the recipe, but didn’t recalculate it with the prep and baking, so it was omitted. It has been fixed.
I hope you’re able to give it another try and let me know how it goes.
If using a stand mixer, how long does it need to be kneaded? Is it still the 7 minutes — the same as if hand kneading?
Rita, I’ve never kneaded dough with anything but my hands. That being said, I don’t see why you couldn’t. I would suggest using your stand mixer with a dough hook to initially combine the ingredients on low speed (setting 2) for two minutes. Then scrape down the sides of the bowl, and continue mixing for another 3-5 minutes until the dough is smooth and elastic. When it’s been kneaded enough, the dough will be springy and shiny as well. From KitchenAid.com, “Tear off a piece of dough and stretch it between your fingers. If it tears, it fails. If it stretches and forms a translucent rectangle, it’s ready to shape into a loaf for proofing or baking.
It’s hard to over-knead dough by hand, but easy to do so by machine. Over-kneaded dough will be dense and rip easily, baking into a dense and flat loaf. If over-kneaded, you’ll want to start over.”
Hope that helps!
Worse bread recipe ever to much water! What are you crazy as much water as flour. You made me want to never make bread again. Stupid recipe.
Mike, I appreciate your feedback. However, I can’t imagine my ingredient amounts are incorrect seeing as how I’ve made it the same way again and again and have not had any issues with the results. There have also been many comments from readers who have made it this way as well without a problem and they’ve loved it.
I’m sorry it didn’t work for you. Not sure exactly what happened. I urge you not to give up though on your bread making. If this recipe isn’t for you, then definitely try another one. I’ve been making bread for YEARS, and still have many mishaps. Keep at it!
Maybe they forgot to add in the additional 5 cups of flour…..after the 3 1/2 water, 3 cups flour, salt, sugar and yeast!
Ps…recipe works properly every time for me. Family and neighbors LOVE it! Thanks
Diane, I am SO happy to hear that! My grandmother is most likely grinning from ear to ear, too! ❤️
This looks delicious 😋
Do you think this could be made in a Dutch oven instead on a pan or stone? I’m excited to try this out!
Taylor, believe it or not, I have never baked a loaf of bread in a Dutch oven, but I don’t see why this recipe wouldn’t work with one. I’m very interested to see what you think and how it goes for you, so would love for you to report back and let me know!
Enjoy!
I’m going to try the Duchoven next time.
I mad it twice the first time I messed up.
This time I found that you need to be careful when getting the second loaf into the oven make sure you got a flat border to transfer to the oven if noticed will go flat. The first loaf look very nice. Were letting it cool and be back for an update.
Thanks for not giving up, Brett! I appreciate the comment and hope it worked out well for you. Sometimes baking can be challenging, but I encourage you to not give up because the results will be so very rewarding and it will fuel you to keep going. I’ve done this for many, many years and I still have days when things don’t go as I’d like them to in the kitchen. Just keep going because I really think you’ll love this recipe.
Just made this for my husband! cant wait for him to get home and try it! The crust is amazing!
Alicia, I’m so happy to hear that, thank you! I hope you both enjoyed it. Of all the recipes on this site, my Grandmother’s Italian bread along with my mother’s Lasagna and my aunt’s Apple Cream Pie are my most cherished and sentimental.
I hope you love this bread as much as my family does.
All i have to say is YUMMY!!! I LOVE making homemade bread and this was by far the easiest recipe!
what’s a good replacement for shortening? i have butter and ghee
Mahwash, I would use the ghee since it has more of a fat content than butter, and you’ll use it in a 1:1 ratio, so use 1 tablespoon of ghee for the 1 tablespoon of shortening called for.
Since I’ve never used anything but shortening in this recipe, I’d love for you to report back and let me know how you liked it. Your feedback would also help others who’d like to do the same!
Just made this and tasted it. Fantastic recipe.
Will definitely make this over and over. I did add a little more sugar and I made 4 smaller loaves so I could share them.
Jamie, that’s so awesome to hear. Thank you for taking the time to let me know! This recipe is very near and dear to my heart, so I’m thrilled that you love it, too!
Since cups can vary, could you please list water and flour in grams? Fill and swipe method is not consistent.
Thank you in advance for.your reply.
Suzan, I will make note to do that the next time I make this Italian Bread recipe. Thank you for the request.