
I LOVE caramel apples. I love candy apples, too, but those really get stuck in my teeth and it annoys me to no end.
Know what I mean? It’s great for a little while, but when you’re on a ride at the carnival and the only thing you can think about besides trying to keep the corn dog and the candy apple down you just ate before you got on this Tilt-A-Whirl is the fact that you’ve got this huge hunk o’ red chewy, sticky stuff stuck to your teeth. And boy, oh boy is it not easy to get off.
But we’re not here to talk about carnival rides and candy apples. NO, we’re here to talk about F-A-L-L.
And it has nothing to do with that Humpty guy, either. No, I’m talking ’bout autumn, kids back in school, leaves falling, and cool crisp days, but not if you live here in Phoenix, it’s still 100 degrees today. There is NOTHING Fallish about that!
And with Fall comes really good food ~ pumpkin pie, squash, apple desserts, and caramel apples! So, here we are with these incredible caramel apples. Yes, they’re yummy and they’re easy to make and it will save you a pretty penny if you make them yourself instead of buying those gourmet ones at the store.
OR, you could buy the ones you see at Walmart that have been sitting around for quite some time starting to get moldy, but I highly recommend you do it yourself. It’s cheaper, tastes better and you’ll have a great bonding experience with the kids.
Now, who doesn’t want some quality time with the youngin’s, especially at this time of year when the school schedule can get pretty hectic. And besides, it will make for great memories. “Mom, remember the time we decorated caramel apples? They were SO yummy!” Yes, memories to last a lifetime and they can decorate them with whatever toppings they desire. You’ll be the mom of the year.
SAVE THESE CARAMEL APPLES TO YOUR FAVORITE PINTEREST BOARD!
Oh, and caramel apples lead me to something else about apples. What about bobbing for apples? If you’re a child of the ’70s (and yes, I suppose I am dating myself) or probably before that, you certainly know this game I dost now speak of.
When I was little, every year our neighborhood would have this awesome Halloween party. And I mean awesome! We’d have a parade in our costumes to see how all the houses were decorated and to show off our costumes led by Mr. Flood on his tractor.
I never did understand why he owned that thing because we lived on a small peninsula with a neighborhood of about 90 houses and we were no way near close to a farm. He only had a front yard and I don’t think that was even big enough to mow it with the thing. Anyway, I digress…as usual. 😉
After the Halloween party, we’d go to the Baker’s (not their occupation, their name) house and play games and eat yummy treats before we went trick-or-treating. Among the games were donuts on a string where you had to eat a donut attached to a string, finding treasures buried in eyeballs, brains, and icky, gooey stuff, and you guessed it, the all-important *insert deep booming voice* BOBBING FOR APPLES!!
Who the heck thought of that game and what on God’s green earth were they thinking?! It. Is. DISGUSTING with a capital D. I’m not gonna lie. Imagine shoving your face into a big-honkin’ tub of water with a dozen or more apples floating in it taking one out using only your teeth.
Sounds pretty easy, huh? I mean, how difficult can it be? It’s a gosh darn pain in the patootie it is! This apple that you’re trying to nab may or may not have bite marks in it from a previous bobber, and it slips away every time you try to bite at it.
Here are some tips and tricks for having all that Halloween apple fun!
-
Do not boil the water and leave caramels unattended. You don’t want burnt caramel. Don’t ask me how I know.
-
If you spin too fast, you will obtain air bubbles.
These are not a big deal if you’re going to be coating it again in chocolate, but if you’re stopping after this step, you’ll want a smooth surface, not something that looks like a warty witch’s face.
-
As the caramel clumps at the bottom, gently remove with a knife, just below the bottom of the apple. (If you want to put nuts or candy toppings on the caramel, this is the point at which you would do that.)
-
If coating with chocolate and then more toppings, the caramel will have to set.)
-
DO NOT overheat the chocolate – once it reaches the stage of “seizing” it is impossible to return it to a melting stage and you will have wasted your money. Trust me on this.
THEN there’s that one minor detail that you are swapping saliva with everyone who has previously opened their mouth in the tub before you. Mind you, this game was played long before a large part of the population became germophobes and diseases spread by body fluids were relatively well known.
I mean, the only thing we were worried about at Halloween is checking the apples we received while trick or treating for razors! But that disgusting game…I can’t even possibly imagine allowing my kids when we went to that same Halloween party (because they grew up in the same neighborhood for about 10 years) to even go near an apple-bobbing bucket!
They did away with the game at the party, but still. Now that you’ve heard me rant about one of my Halloween memories for which I’ve needed years of therapy, shall we make caramel apples now and leave this on a good note? I think so.
~ FOLLOW ME ~
~ FACEBOOK ~ PINTEREST ~
~ INSTAGRAM ~ TWITTER ~
SIGN UP FOR THE WEEKLY 365 DAYS OF BAKING & MORE
WEEKLY NEWSLETTER!
JOIN THE 365 DAYS OF BAKING AND MORE FACEBOOK GROUP TO RECEIVE ADVANCE NOTICE OF MY LIVE FB VIDEOS, SHARE RECIPES AND MORE!

Caramel Apples
Ingredients
- 7 cups water
- 3 tablespoons white vinegar
- 2 large Granny Smith apples
- 2 Pink Lady apples
- 4 sticks
- 2 14 oz. bags wrapped wrapped caramels
- 4 tablespoons water
- 1 teaspoon vanilla
- toppings of your choice
- 2 cups semi-sweet morsels
- 2 cups white chocolate morsels
- 1 cup dark chocolate morsels
- ½ cup chopped peanuts
- ½ cup Heath Toffee Bits
- various Halloween sprinkles
- Halloween Nerds
Instructions
- Prepare a baking sheet by lining it with parchment paper and spraying it with cooking spray.
- Pour water and vinegar into a large bowl. Wash the apples in the vinegar solution, drying them off completely.
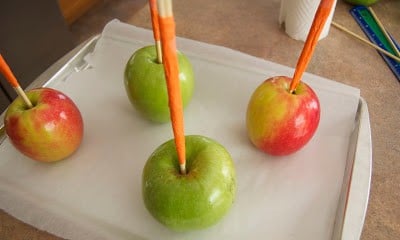
- Place the apples on the baking sheet and place a stick into the center of each, stopping at about 3/4 of the way through the apple. (This was the most difficult part of the process.)
- Place the tray of apples into the freezer while preparing the caramels.
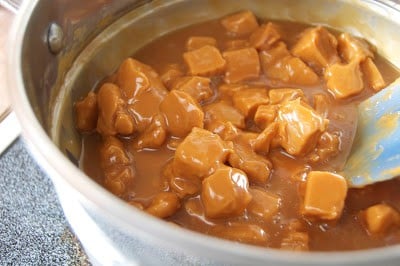
- Unwrap the caramels and place into the top of a double broiler. The bottom should be filled halfway with water and brought to a simmer.
- Add water and vanilla.
- Stir continuously until caramels are completely melted. This could take you a little while, but just be patient. It will be worth it.
- Do not boil the water and leave caramels unattended. You don’t want burnt caramel. Don’t ask me how I know. Remove apples from the freezer and remove caramel from heat.
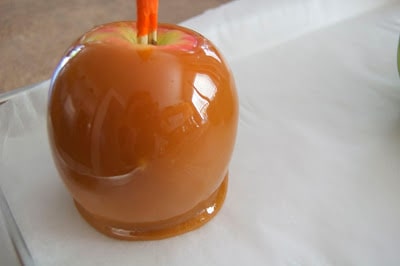
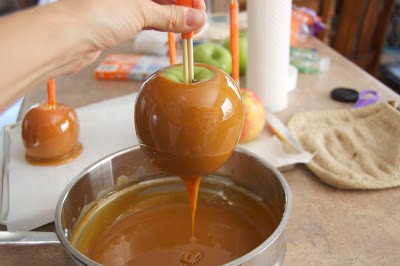
- Using one apple at a time, dip the apple into the caramel. Gently and slowly spin the apple until it is completely coated.
- Allow excess caramel to drip back into the pan. Place onto prepared baking sheet and repeat with remaining apples.
- Put the tray of apples into the refrigerator for at least 20 minutes for caramel to set.
- Put desired toppings ie, candy, nuts, sprinkles into separate bowls.
- If using chocolate for a second coating, place morsels into a microwave safe bowl and microwave for 30 seconds. Remove bowl and stir.
- Remove apples from the refrigerator and one at a time, gently roll the apple in the chocolate followed by desired toppings.
- Place finished apple onto a prepared baking sheet and refrigerate for 30 minutes until toppings are set.
Nutrition
ENJOY!!!
I rate everything I make on a scale of 1-4 with 4 being the best and these Bad Butt Caramel Apples earned 4 rolling pins! I would have made my own caramel sauce, but have never made these before and knowing caramel has a small window before “going south” when homemade, I opted for the bags.
In need of other apple recipes? Don’t worry, I have you covered.
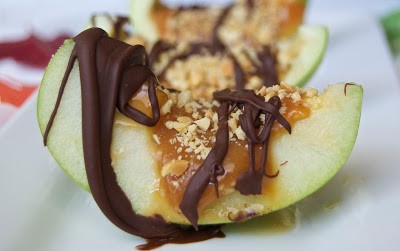
Inside Out Caramel Apples
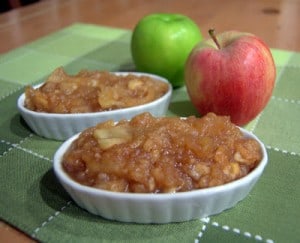
Baked Applesauce
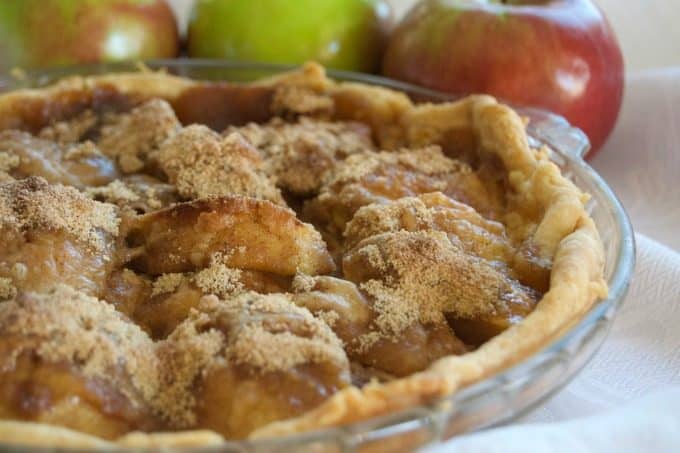
Apple Cream Pie
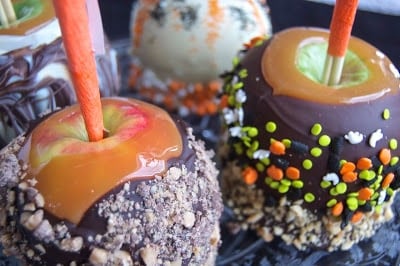
They worked perfectly and of course, no one complained. We made four different apples: milk chocolate coated with toffee bits, dark chocolate coated with sprinkles, white chocolate coated with sprinkles and Nerds on the bottom, and the piece de resistance, white chocolate coated in milk chocolate then drizzled with white chocolate and swirled with a stick.
MAN, I LOVE these THINGS!! I did have some caramel, chocolate, and nuts left over, so come back tomorrow to see what else I made. Remember, eat the caramel apples. DON’T go bobbing for them!



Comments & Reviews
What a great idea. Thanks for all the fabulous tips and in depth instructions. I’ll definitely be giving these a go with my kids!
Wow!!! Now that is what I call caramel apples! They bring back boyhood memories, but we never had them like yours. Great idea!
Keep smiling, Steve
YUM! Who could resist eating one of those beauties.
You don’t know how much I’m craving caramel apples after looking at your photos!!!! YUM!
looks real fun
Terrific! Those caramel apples look amazing and so tempting.
Cheers,
Rosa
great post! and those apples look devilishly divine! 🙂
Uff… que rico recuerdos de mi infancia mamá las hacía con caramelo rojo ,están divertidas y muy bonitas,abrazos hugs,hugs.
I’m dumb, when melting the Carmel it says add water. Is that the full 7 cups?
Holls, no, DO NOT add that much water to the caramel. That 7 cups is to be combined with the vinegar and used as a bath for cleaning the apples off. The 4 tablespoons following the amount of caramels in the ingredients is to be added to them along with the vanilla extract.