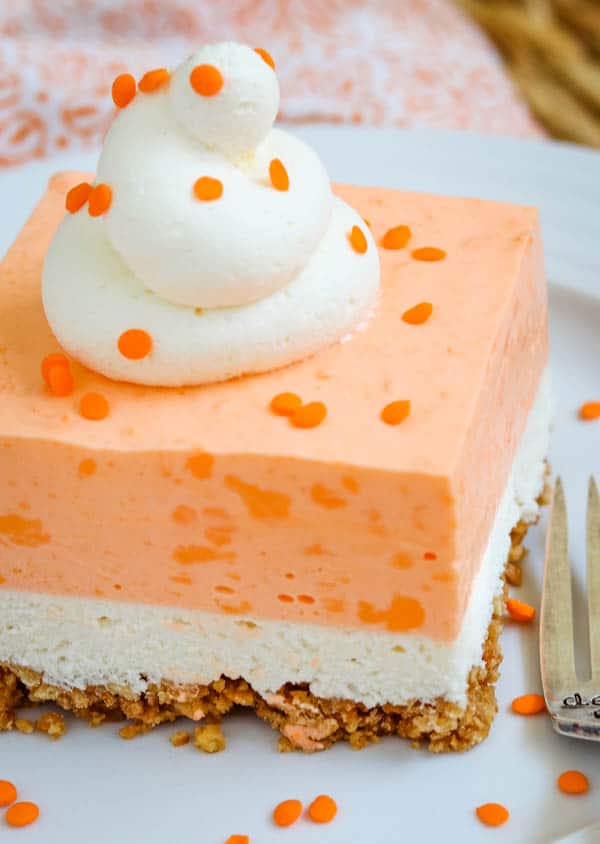
These Orange Creamsicle Dream Bars are the perfect no-bake dessert for summer! Your whole family will love the crunchy crust, sweet cheesecake layer, and refreshing orange cream topping. One taste of this sweet summer dessert, and you’ll go right back to the days of buying an Orange Creamsicle off the ice cream truck.
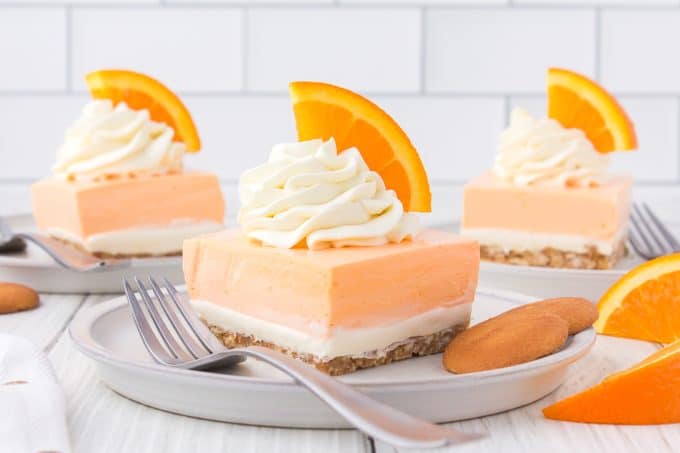
The Orange Creamsicle was and still is one of my favorite ice cream treats to eat on a hot day. There’s just something about that orange flavor with the vanilla ice cream in the middle that makes me all happy when I take a bite. So, seeing as how those ice cream bars are so popular, I thought it made perfect sense to make that sweet treat into a Dream Bar recipe.
SAVE THIS NO-BAKE RECIPE FOR ORANGE CREAMSICLE BARS TO YOUR FAVORITE PINTEREST BOARD!
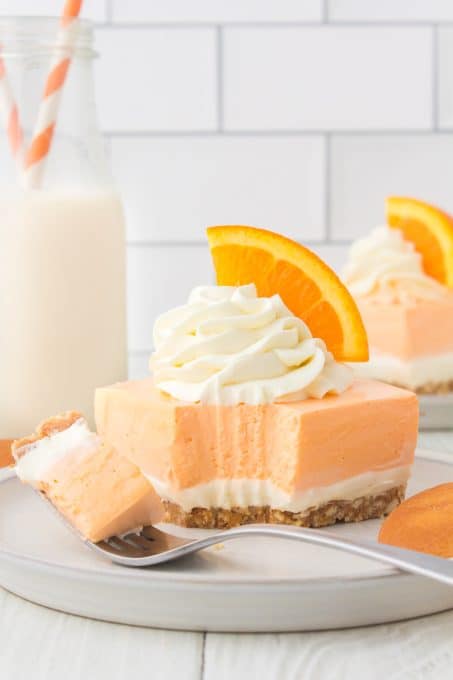
New to Dream Bars?
Dream Bars are some of the most popular recipes on my site (and some of my favorite recipes too!) Each one starts with a cookie or cake-like crust, followed by a sweetened cream cheese or cheesecake layer, a pudding or gelatin layer, and a whipped topping with candy, fruit, or cookies to finish it off! There are so many variations; dream bars will become your favorite treat to make!
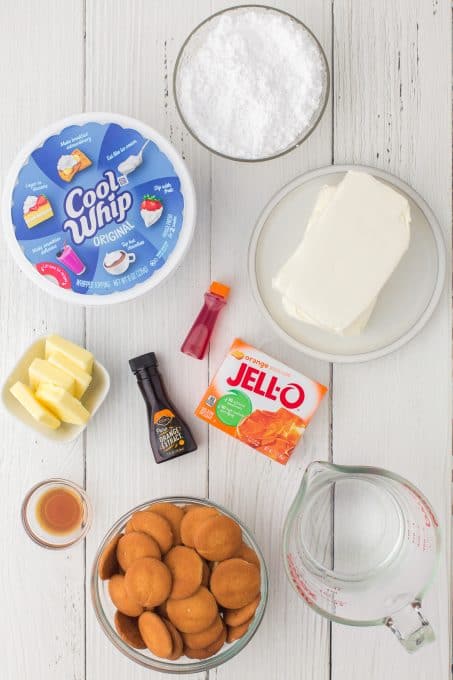
Ingredients for Orange Creamsicle Dream Bars
Let’s go over the ingredients for each layer:
Crust layer
- 1 1/3 cups of Nilla Wafer Cookie crumbs
- 5 tablespoons melted butter
Orange Cream Layer
- 3-ounce package of orange JELL-O
- ¾ cup boiling water
- ¾ cup cold water
- 8 ounces of cream cheese, room temperature
- ¼ cup of powdered sugar
- 2 teaspoons of orange extract
- 8 drops of orange Wilton gel food coloring (optional)
I’ve found that the gel food coloring works the best and gives it a brighter orange - 2 cups of Cool Whip
Cheesecake Layer
- 8 ounces of cream cheese, room temperature
- 1 cup confectioners’ sugar
- 1 teaspoon pure vanilla extract
- 1 cup of Cool Whip
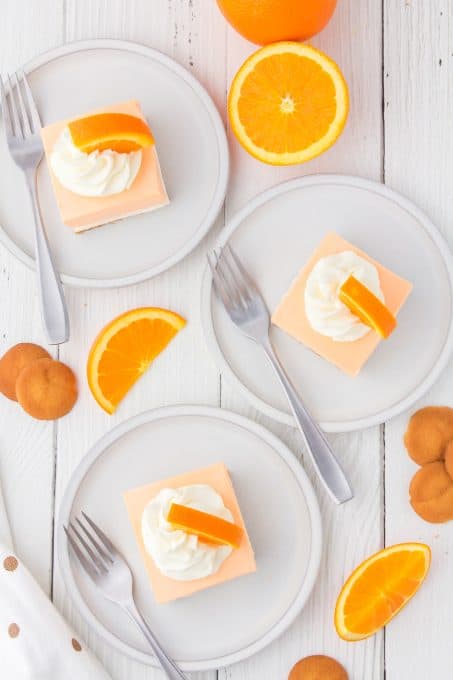
You can use the remaining Cool Whip as a garnish on top of each finished slice with some orange zest, orange slices and whole Nilla wafers.
How to make Orange Creamsicle Dream Bars
These orange creamsicle cheesecake bars have several layers, so we’ll break down the steps for each one.
Line your 8 X 8-inch baking pan with parchment. This way, you can easily remove the entire tray of bars, peel down the slides, slice them, and neatly serve them. Also, it makes for minimal cleanup.
Make the Crust
Note: I really like using Nilla Wafers for the crust. For another option, make a graham cracker crust with 1 1/3 cups graham cracker crumbs. Or, try 1 1/3 cups of crushed sugar cones. The first time I made these I used crushed sugar cones and preferred a cookie crust going forward.
I used Golden Oreos for the crust but found the dessert was too sweet. I’ll opt for Nilla Wafers or a shortbread cookie like a Lorna Doone every time.
Making the crust and putting it into the freezer to set is the first thing I do. That way, it can have a chance to harden during the hour the cream mixture is in the fridge chilling as well.
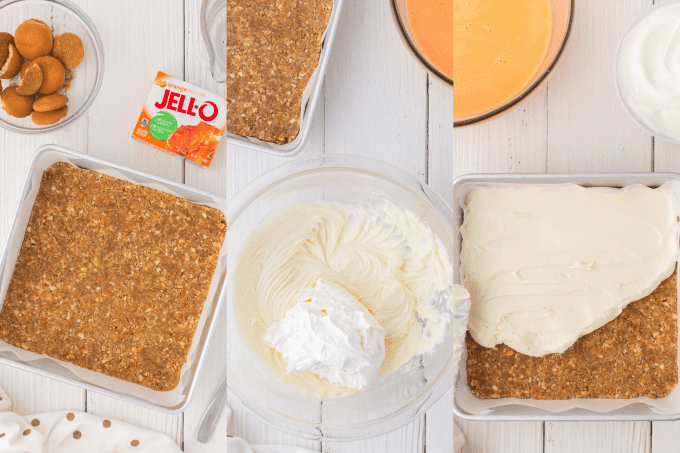
Melt the butter and crush the Nilla wafers in a food processor until they resemble fine crumbs. Combine in a small bowl with a rubber spatula. Transfer the crumb mixture to the prepared pan and spread evenly in the bottom of the pan, pressing down firmly to create an even crust.
Place the pan into the freezer for at least 30 minutes while preparing the rest of the recipe.
Make the Orange Gelatin
When mixing the orange gelatin, ONLY use the amount of water stated in THIS recipe, NOT as is called for on the box. We want the mixture to be a bit more stable than usual.
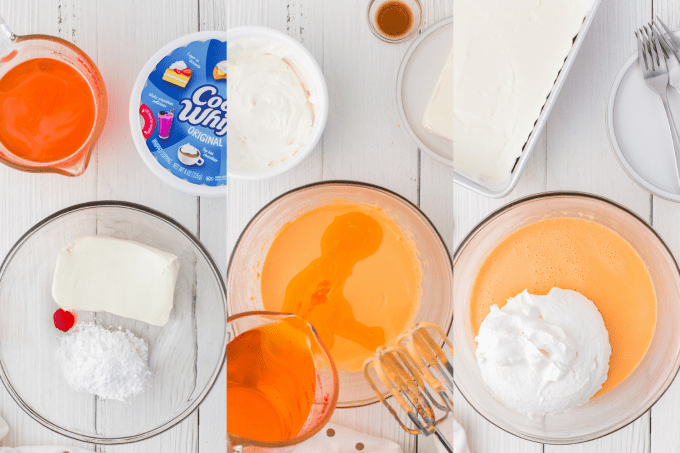
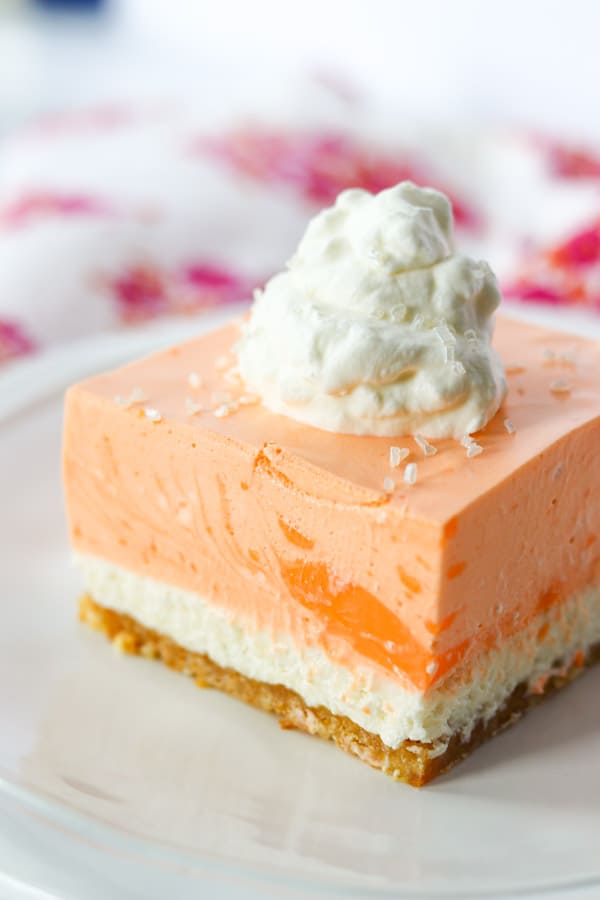
Mix the gelatin with ¾ cup boiling water and stir until dissolved. Add the ¾ cup cold water and stir. Chill the gelatin until it is cold, about 10 minutes. You do not want it to set. If it does set, it won’t blend as smoothly with the cream and you’ll have orange chunks of gelatin throughout the dessert. It will still be delicious, it just won’t resemble the pictures.
Orange Creamsicle Layer
Combine 8 ounces of cream cheese in a large bowl with sugar, orange extract, and orange food coloring. Slowly add the chilled gelatin mix while stirring. Continue to stir until it is completely smooth, then place the orange cream mixture into the fridge to chill and thicken for about an hour.
If you leave it in the refrigerator longer than this, the gelatin will harden and form. This is a matter of personal taste, and I actually don’t mind it either way. It just changes the appearance and texture slightly.
Cheesecake Layer
In a mixing bowl, beat together 8 ounces of cream cheese, confectioners’ sugar, and vanilla together on medium speed until smooth and creamy. Fold in the Cool Whip with a rubber spatula.
If you prefer not to use Cool Whip, make my Stabilized Whipped Cream. It makes the perfect amount of whipped cream you’ll need for each of my Dream Bar recipes and tastes much better, too!
Assemble the Orange Creamsicle Dream Bars
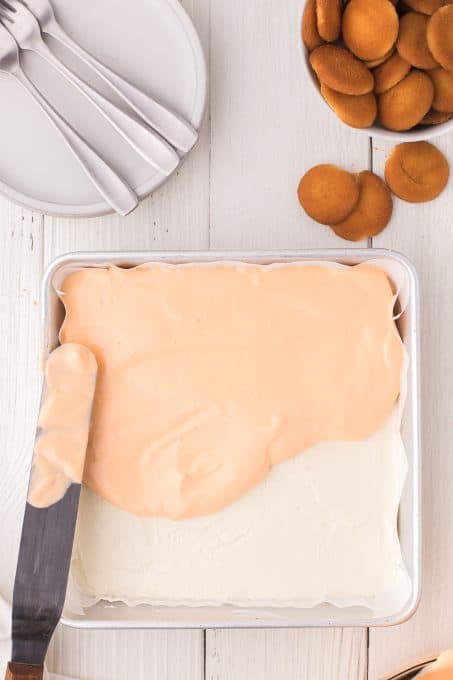
Place dollops of cream cheese mixture onto the frozen crust then spread them with an offset spatula to form an even layer.
With a rubber spatula, fold the remaining 2 cups of Cool Whip into the chilled Orange Cream mixture and combine until evenly distributed and smooth.
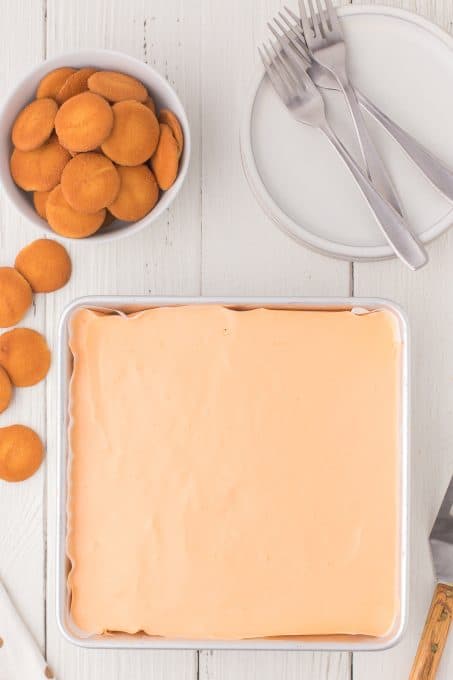
Gently spoon the Orange Creamsicle top layer onto the cheesecake layer and spread evenly with an offset spatula.
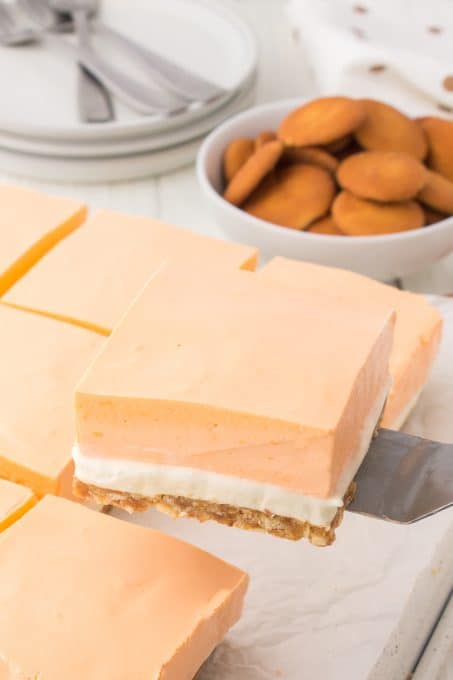
Once finished, refrigerate the Dream Bar recipe for at least 6 hours or overnight. I like the overnight option because it’s a dessert you can make the day before serving it. It slices better for a pretty presentation, too!
How do I cut these Creamsicle Bars?
After making many Dream Bar recipes, I prefer to use the parchment paper to line the pan so that I can remove them when I’m ready to cut them into individual bars.
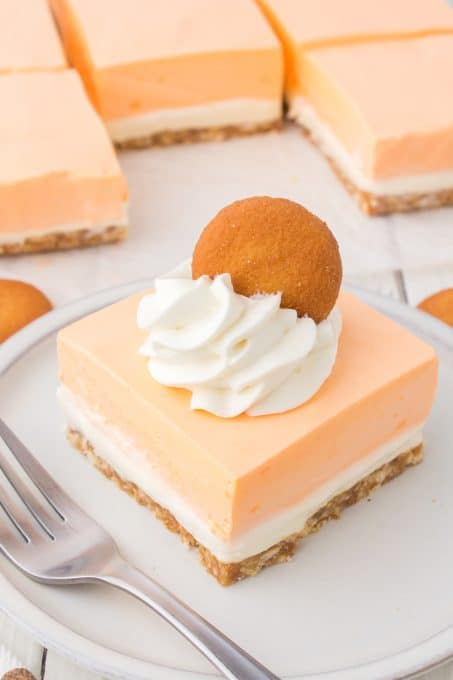
When slicing, I use a large knife that I run under hot water and dry with a clean towel in between each slice. Using the hot knife helps to make even slices and almost ensures that the layers will remain intact, making a prettier presentation for family and friends.
How to store leftover Orange Dream Bars
These dream bars should be covered and stored in the refrigerator. They will be good for about 3-4 days. You can also store individual servings in an airtight container in the fridge.
More No-Bake Desserts
If you like this Orange Creamsicle Dream Bar recipe and want more no-bake cheesecake and other easy dessert recipes for your summer fun, try one of these:
- Strawberry Cheesecake Dream Bars– another popular dream bar that combines flavors at the top of my list of favorites!
- No Bake Lemon Cheesecake– This lemon dessert is the perfect summer treat and is so easy to make!
- No Bake Nutella Snickers Pie– Get your chocolate kick without heating up the oven!
- Red and Blue Raspberry Dream Bars – make them individually or when served side by side they’re perfect for a gender reveal party!
- Strawberry Lemonade Dream Bars – are the perfect refreshing dessert for summer with a great flavor combination everyone will love.
FOLLOW ME
FACEBOOK ~ PINTEREST
INSTAGRAM ~ TWITTER
YOUTUBE
Keep an eye out for more of my easy recipes each week!
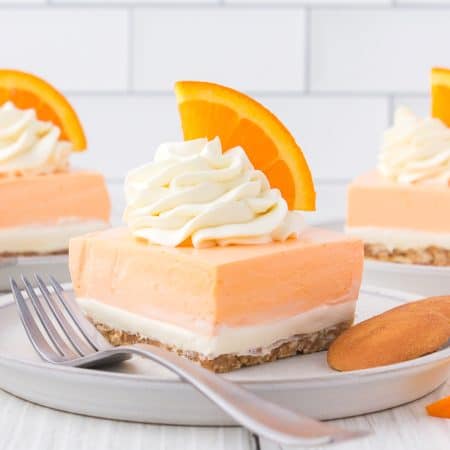
One bite of these no bake Orange Creamsicle Dream Bars and you’ll be transported back to childhood and eating the frozen treats off the ice cream truck.
Orange Creamsicle Dream Bars
Ingredients
- 8 ounces Cool Whip divided
Nilla Wafer Crust
- 1 ⅓ cups Nilla Wafer Cookie Crumbs
- 5 tablespoons unsalted butter
Orange Cream Layer
- 3 ounces orange gelatin
- ¾ cup boiling water
- ¾ cup cold water
- 8 ounces cream cheese room temperature
- ¼ cup powdered sugar
- 2 teaspoons orange extract
- 8 drops orange Wilton Gel Food Color optional
- 2 cups Cool Whip
Cheesecake Layer
- 8 ounces cream cheese room temperature
- 1 cup confectioners' sugar
- 1 teaspoon pure vanilla extract
- 1 cup Cool Whip
Instructions
Nilla Wafer Crust
- Line a 8 X 8-inch baking pan with parchment, so that you can easily remove the bars to evenly slice and remove them.
- In a medium bowl, melt the 5 tablespoons of butter in a microwave for about 30 seconds. Stir and melt for another 5-10 seconds, if necessary.
- In a food processor, pulse the Nilla Wafers until they are fine crumbs.
- Add the cookie crumbs to the melted butter and mix with a rubber spatula until all is well incorporated.
- Pour into the prepared baking pan and spread evenly into the pan, pressing down to create an even crust. Place pan into the freezer while preparing the rest of the recipe, a minimum of 30 minutes.
Orange Gelatin
- Into a 2-cup measuring glass, mix the orange gelatin with 3/4 cup boiling water. Stir until dissolved.
- Add the 3/4 cup cold water and stir. Place into refrigerator until completely cooled, but not set – about 10 minutes.
Orange Cream Layer
- In a mixing bowl, beat 8 ounces of the cream cheese with the sugar, orange extract and orange food coloring.
- Slowly pour in the chilled gelatin mix while mixing everything together. The slower you pour and allow time for it to blend, the smoother a consistency you'll get. Once completely smooth, place into refrigerator to chill and thicken for one hour. *See Note.
Cheesecake Layer
- In a mixing bowl, beat another 8 ounces of cream cheese, the confectioners' sugar, and vanilla together until smooth and creamy. With a rubber spatula, fold in one cup of the Cool Whip.
- Place dollops of cheesecake mixture onto the frozen crust and with an offset spatula, spread to form an even layer.
- with a rubber spatula, fold the remaining Cool Whip (about 2 cups) to the chilled Orange Cream mixture, combining until evenly distributed and smooth.
- Gently pour the Orange Cream onto the cheesecake layer and spread evenly with an offset spatula.
- Place into the refrigerator overnight or for a minimum of 6 hours.
Notes
If Orange Cream mixture is left in refrigerator for more than one hour, the gelatin will harden and form. This isn’t an issue unless you want a completely creamy layer for the top with NO orange gelatin specks. I think it’s a matter of personal preference and won’t affect the taste. It does look nice both ways, and will be delicious regardless, so don’t fret if there are chunks you hadn’t expected.
Nutrition

Comments & Reviews
Hey, Lynne you are too good at baking I have been following you since last year and have tried lots of cake shared by you. Everyone in my family is a huge fan of yours! I will bake this too at my nephew’s birthday.
This recipe works great – It tastes exactly like the orange creamsicles I used to have as a kid. I made mine using graham crackers for the crust since that’s what was on hand, and subbed in neufchatel cheese instead of cream cheese. The bars were softer and not as firm as you might expect with proper cream cheese, but it still held it’s shape enough to cut up and serve with a fork.
The orange gelatin mix alone was also enough to provide a nice orange color without adding any food coloring.
Thanks so much, Sierra. I’m so glad you liked it and appreciate the feedback and rating!
The color is so pretty!! Thank you for the nice recipe, I will definitely try it!
Nice orange dream bars. thanks for the recipe.
Re-read your comments where you’re talking about using the vanilla wafers. You had said 1-1/3 cups and the same amount of butter…(i thought to myself, that’s a lot of butter!) then in the recipe i see It calls for 5T. Butter… just noticed that when i was Reading through. Excited to try this as orange dream is a favorite!
Tamara, sorry about the confusion and thanks for letting me know. I’ve updated the post to make it more clear.
Does this need to be in the fridge until it is served? How long can it be out on the counter before it’s starts to soften?
Holly, I would definitely keep it in the refrigerator until serving since jello tends to become a bit more liquid as it warms. I wouldn’t leave it on the counter for more than an hour or so.
Would this be ok to make 2 days in advance. I have multiple things I have to make so trying to see what I can make ahead of time. Thanks.
Sarah, I think you should be ok to do that even though I’ve never had them longer than a day in our home. Definitely cover the pan tightly with plastic wrap, and keep in the fridge until serving. Hope everyone loves them!
Made this last weekend and it was such a hit that I have been asked to make it again this weekend! If I don’t use parchment, do you spray the pan with nonstick spray? Thanks for the recipe!
Yay!! Robin, thanks so much and I’m so glad you liked them. They’re a favorite here, too!
If I don’t use the parchment, I don’t usually spray the pan. It really isn’t necessary. I just find it easier to use the parchment to lift the bars out of the pan to slice them more evenly, but you can remove them from the pan without it or cooking spray as well. Enjoy them again!
Can’t wait to try it. Have you ever doubled the recipe for a 9×13 pan ?
Cindy, I have not doubled the recipe, but it can definitely be doubled and made in a 9 X 13-inch pan. Enjoy it!
How does this recipe work with Kosher gelatin? It got clumpy before it was time to add it to the whipped cream part.
Amy, unfortunately, I am unfamiliar with kosher gelatin having never used it. When using the regular gelatin, I’ve noticed that if I leave it in the refrigerator for too long that it starts to clump. I suppose the key would be to check on it regularly. You want the gelatin regardless if it’s kosher or not, to be cold enough so that it’s thick, but not to the point where it’s already setting before you mix it with the whipped topping. Hope that helps!
In your general instructions before the recipe, you say to use an 8 X 8 pan, but then in the recipe itself you state to use a 9 X 9 pan. Confusing for sure.
Claudia, I apologize for the confusion and appreciate that you brought that to my attention! I have edited the recipe as it should read an 8 X 8-inch baking pan. You could honestly use either and I have, but I liked the height of the layers when I made it in the 8 X 8-inch. I had just forgotten to correct that in the recipe when I’d made it again.
Enjoy it!
Thank you for the speedy reply about the pan size. I’ll be making this real soon. Thank you for posting your recipe.
Making these right now for July 4th. Confused because the entire recipe says it calls for 8 oz of cool whip. In the ingredient list by layers it says 2 cups of cool whip in the orange cream layer. Then the instructions for the orange cream layer do not mention adding cool whip. Help! Which is correct?
Wendy, my apologies for not responding sooner. The 2 cups of cool whip are not added to the orange gelatin before it is placed into the fridge. If you read the directions below the cheesecake layer, you’ll see in step #3 it says to add the cool whip for the orange cream layer. Hope it turned out for you!
Your picture looks like it has an orange in the finished product. Is there ranges in this ?
Hi Debby!
There are no oranges in this Orange Creamsicle Dessert. The darker orange color you see in the pictures is just some of the thicker pieces of gelatin that hadn’t blended completely with the other ingredients when I mixed it.
I used to work in a restaurant that had a salad bar which featured a molded version of this but they didn’t use coolwhip, perhaps it was vanilla ice cream?? any way I was wondering if you knew. Pretty sure it was orange gelatin, orange sherbet & ice cream i think -It was so delicious…. been looking for the recipe but every one I see has cool whip yuk…..think we also had a raspberry version –
Hi, I volunteer for the senior luncheon once a month. I would like to make this for a dessert. I’m a little confused. One layer crust, one layer cream cheese mixture, one layer orange mixture, then extra cool whip for a scoop on top or are you using cream cheese mixture?
I’m going to make it for my hubby as my guinea pig. LOL. He will love this. Sorry I’m so thick headed.
Ruthann, you’re not thickheaded and I am happy to help in any way that I can!
The cream cheese mixture is the “cheesecake layer” that is on top of the crust and under the orange jello mixture.
You can add some more whipped cream or Cool Whip to the top to finish the dessert off before serving, but it isn’t necessary.
Hope your “guinea pig” loves it and approves it for your senior luncheon! 😉
Delicious, but it does not work in 9×13 pan as suggested in another comment. There isn’t room for all the orange layer
Tucker, thanks so much for the feedback. Having only made them in a square pan, I’ll have to make them again in a 9 X 13 and make note of the ingredient adjustments.
Delicious!! Can you freeze leftovers?
Cheryl, I have not frozen them, and from what I’ve found when I Googled, “Can you freeze jello”, it is not suggested. I’ve read that the jello won’t freeze completely and when it thaws you’ll be left with a gooey jelly and some ice slush, so I wouldn’t suggest it.
You can store them in the refrigerator for up to 3 days when covered with some plastic wrap.
I haven’t made it yet,however
The quantities are waaaay off!
In the recipe it calls for 8 oz
Cream cheese then 8 oz Cream
Cheese. In the Ingredient section
It calls for 24 oz and 24 oz.! Also
Cool Whip it calls for a total of
3 cups and the ingredient section,
It callls for a total of 9 cups! I can’t
Tell if the jell-o or the powdered
Sugar are correct, but I guess I’ll find out
Teri, I’m sorry, but I don’t know where you’re coming up with the 24 oz and 24 oz as well as the 9 cups of Cool Whip. Did you change the amount of servings? The original recipe is made in a 8 X 8-inch pan and will serve 9 people. I’ve tried to explain it all as clearly as possible both in the post and recipe card.
You’ll need one 8 ounce tub of Cool Whip, DIVIDED (as is stated in the recipe card at the top) which will then be divided throughout the recipe. You’ll need 2 cups of it for the Orange Cream Layer and 1 cup of it for the cheesecake.
As for the cream cheese, you need 8 ounces for the orange cream layer and another 8 ounces for the cheesecake.
If you follow the instructions correctly, and use the amounts stated for all ingredients listed in the recipe as directed, the amount of the powdered sugar you’ll need for both the orange cream layer and cheesecake layer are correct.
I’ve made this quite a few times and have used it as a base for a few of my other dream bar recipes, so I know everything is listed as it should be.
Please clarify.
Can I make this in a 9 inch round springform?.
Karen, if you’re going to do that, I would recommend increasing the amount in the ingredients in the crust and cheesecake layer as follows because your surface are is larger:
Crust
2 cups Nilla Wafer Cookie Crumbs
7 tablespoons melted butter
Cheesecake Layer
12 ounces cream cheese, room temperature
1 1/2 cups confectioners sugar
1 1/2 teaspoons vanilla
1 1/2 cups Cool Whip (know that you’ll now need more than an 8 ounce tub, but you can use it to decorate the top!)
You can leave the Creamsicle Layer as is since that is pretty thick, but it won’t be as high as in my pictures.
Please let me know how it turns out! I’d love to hear and this would help others who might be interested in doing the same.
My family really loved this! Thank you for sharing, it’s a keeper for sure.
Great dessert…I served it last night for a family dinner and it got rave reviews. Turned out just like the picture and very easy to cut and serve. Well worth the prep time.
Powdered sugar and confectioner’s sugar are the same thing. But they turned out tasty.
Thank you, Jennifer. Yes, those sugars are the same thing, just different names. Glad you enjoyed them and thanks for letting me know.
I made this recipe today. What a struggle! The order of the recipe order is out of whack. I’m using my phone to make it, and I’m scrolling down. I’m following the steps. You have the orange cream layer right after the crust. I’m not thinking about the picture, bc I cannot see the picture. So, I have the orange section on top of the crust…. Only to realize it should have been the cream cheese section. Which certainly won’t spread smoothly for a top. Even in the ingredients section you have orange before the cream cheese. Please just make it less stressful to follow by phone. It looks like a yummy recipe, but I’m so frustrated. Maybe I’ll just put cool whip on top and call it done.
Hey Mary! The order of the recipe is not out of whack, but in the order it should be. I have the ingredients and instructions for the orange cream layer after the crust because it’s the next logical step in the process to make as it takes the most time to prepare and set even though it isn’t the next layer on top of the crust.
I’m not sure if you did, but reading through the recipe before starting is always suggested and can definitely help clear up any confusion. I admit that I sometimes don’t do it, and only end up running into problems while making it.
Can you add drained canned mandarin oranges to the orange jello mix?
Sandy, I have not done that and not sure how adding them would affect the outcome of the recipe. I’d hate to say yes, and go for it, and it be a waste of ingredients. But if you want to give it a go, I’d love for you to report back and let me know how it went as other people may be interested in doing it as well.
I’m trying to make this but Is it just me or this recipe hard to follow? Where does it say to add the Cool Whip to the orange Jello mixture? Thanks.
Jayne, you’ll find that direction in step 3 under the Cheesecake Layer. The reason I didn’t put it under the Orange Cream Layer is because the cream cheese and gelatin needs to chill for an hour before you add the Cool Whip to it.
It just seemed logical to me to move ahead with the making of the cheesecake while waiting.
This was so good my family asked me to make more I added the Maderine oranges from the can bought the 4oz individual container with lids easier to give them out thank you will keep making them
Such a confusing recipe!!!
I’m sorry, De. I’ve tried to make it as simple as possible by separating both the ingredients and instructions into sections.
What are you having difficulty with? Let me help clarify it for you.